How Does the Instructor Portal Work?
Last updated: June 9, 2026
The instructor portal is a simplified view of Noto built specifically for instructors. It gives them access to their schedule, students, earnings, and availability — without exposing admin-level settings or billing. This article walks through the key workflows from an admin's perspective.
Inviting Staff to the Portal
Navigate to the Staff section from the left-hand navigation bar.
Open a staff member's profile, select all, or select specific staff and click Actions.
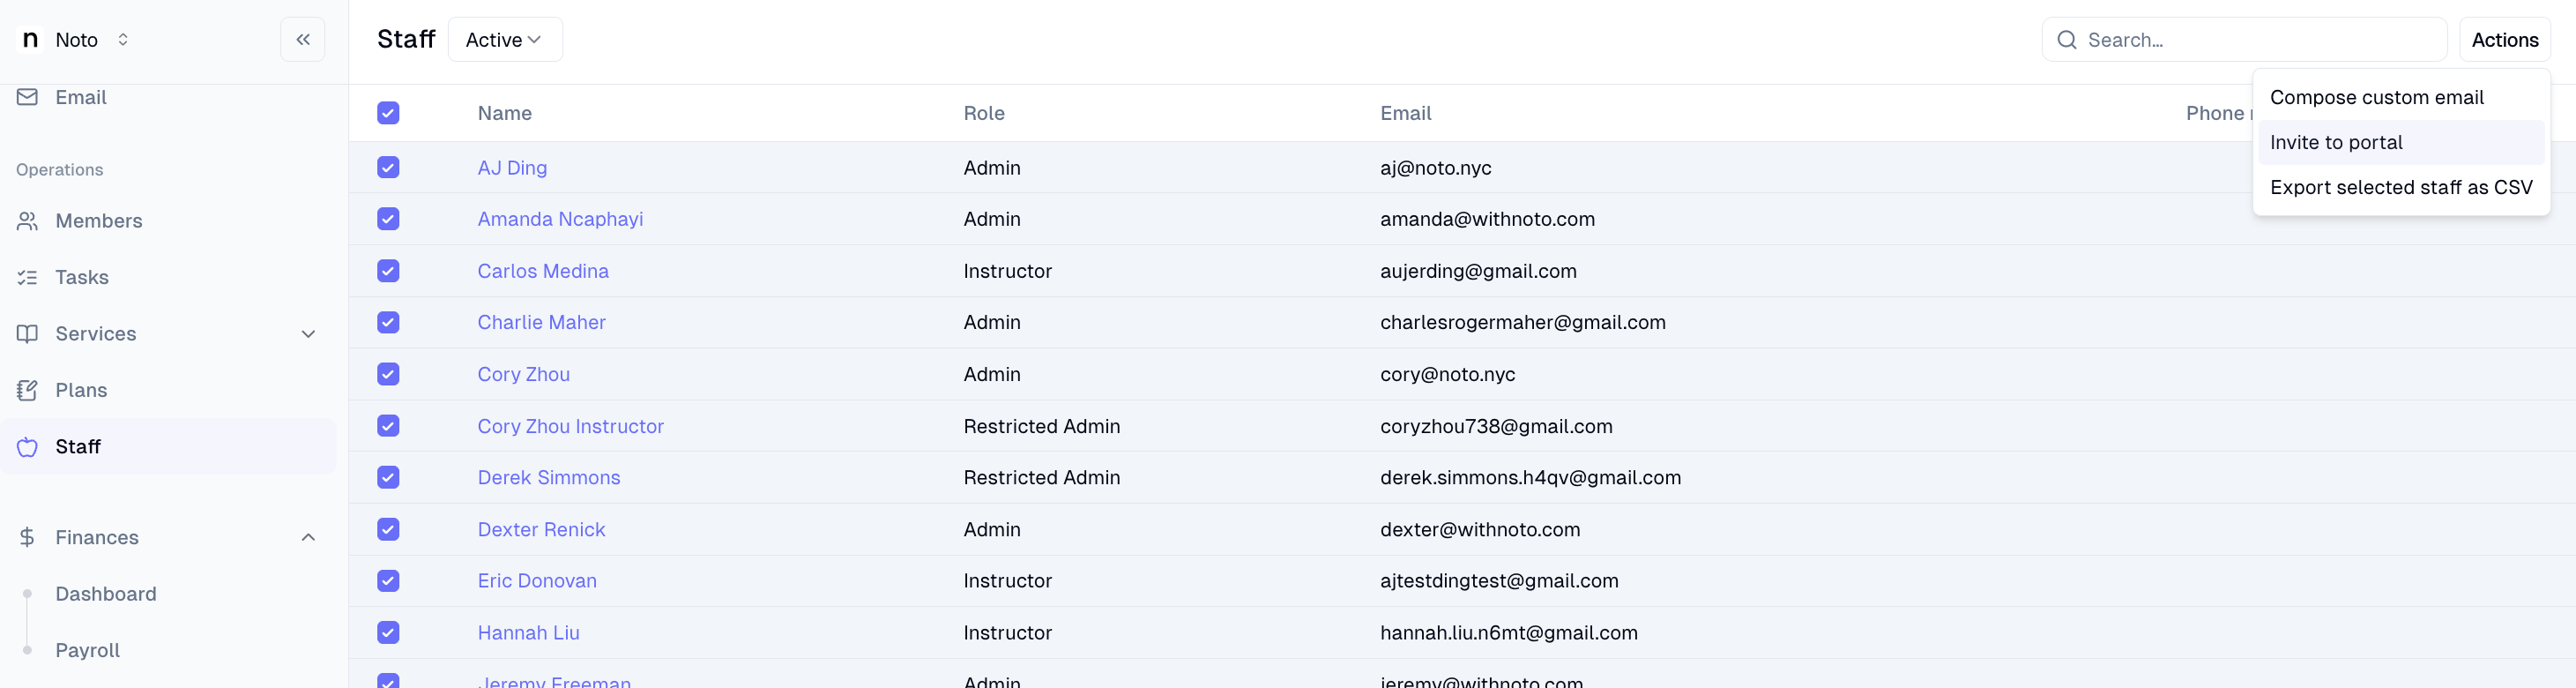
Click Invite to Portal. The staff member will receive an email invitation at their registered address.
Once they accept, they can log in at app.withnoto.com using their email. If their email is connected to a Google account, Google sign-in is recommended.
Staff will only have access to their own schedule, students, availability, and earnings. They cannot view billing, other instructors' schedules, or admin settings.
Members
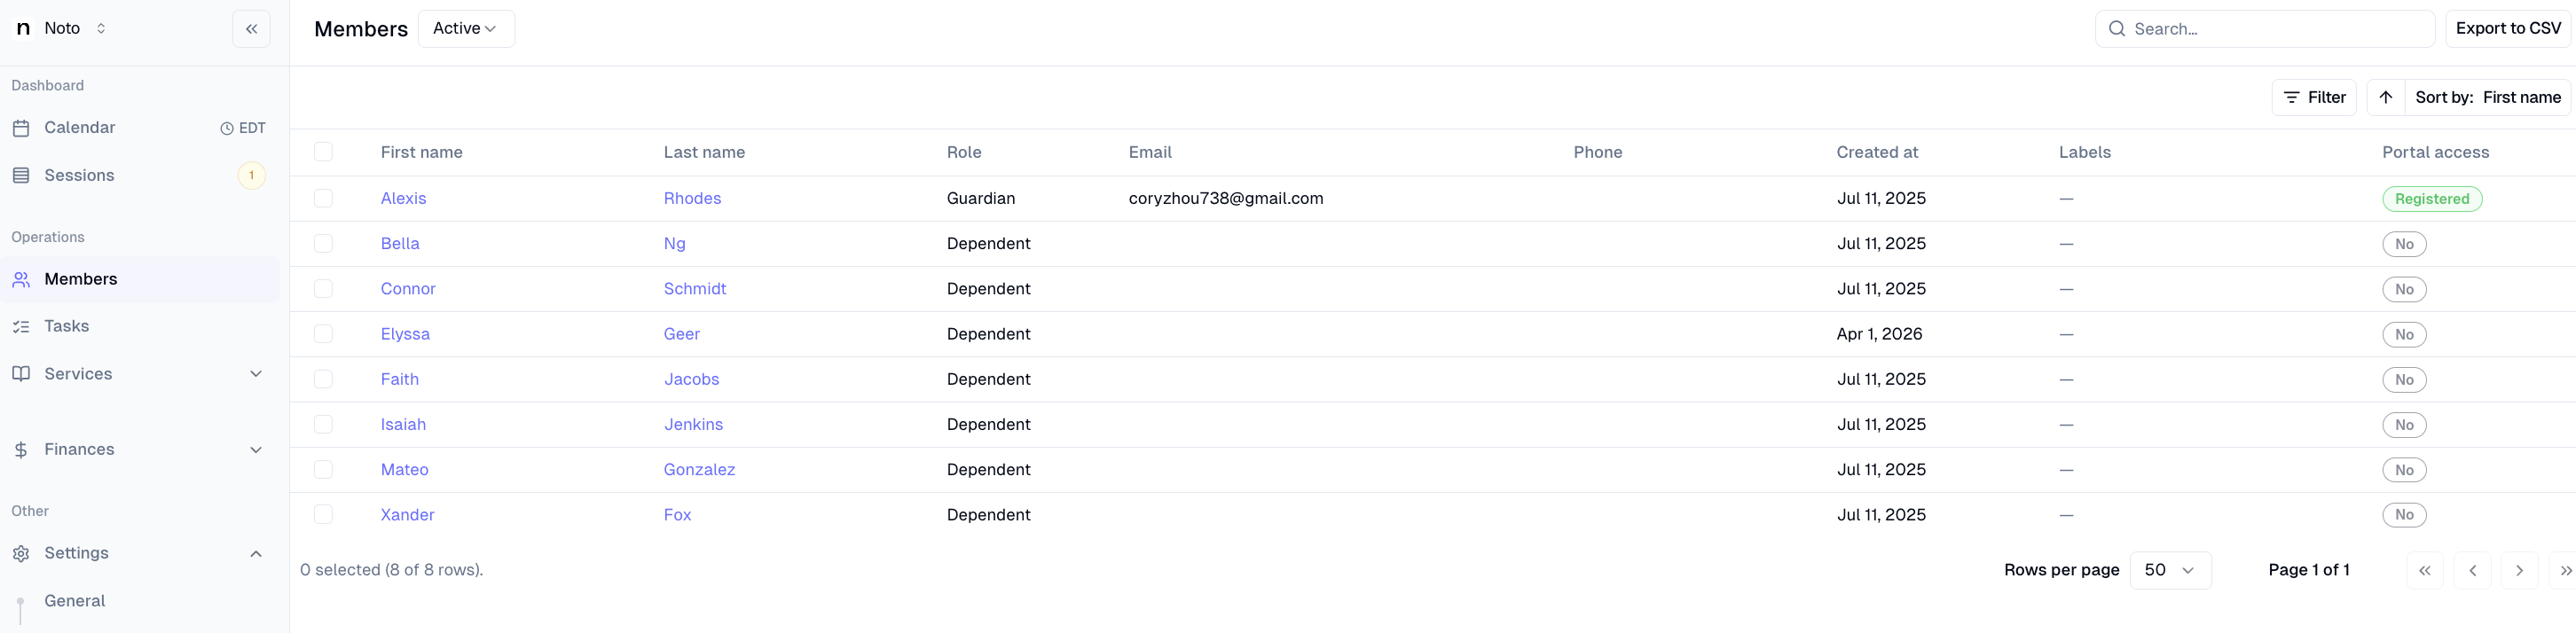
The Members tab in the staff portal shows the instructor their current students — anyone enrolled in a service with them.
From the staff portal, navigate to the Members tab.
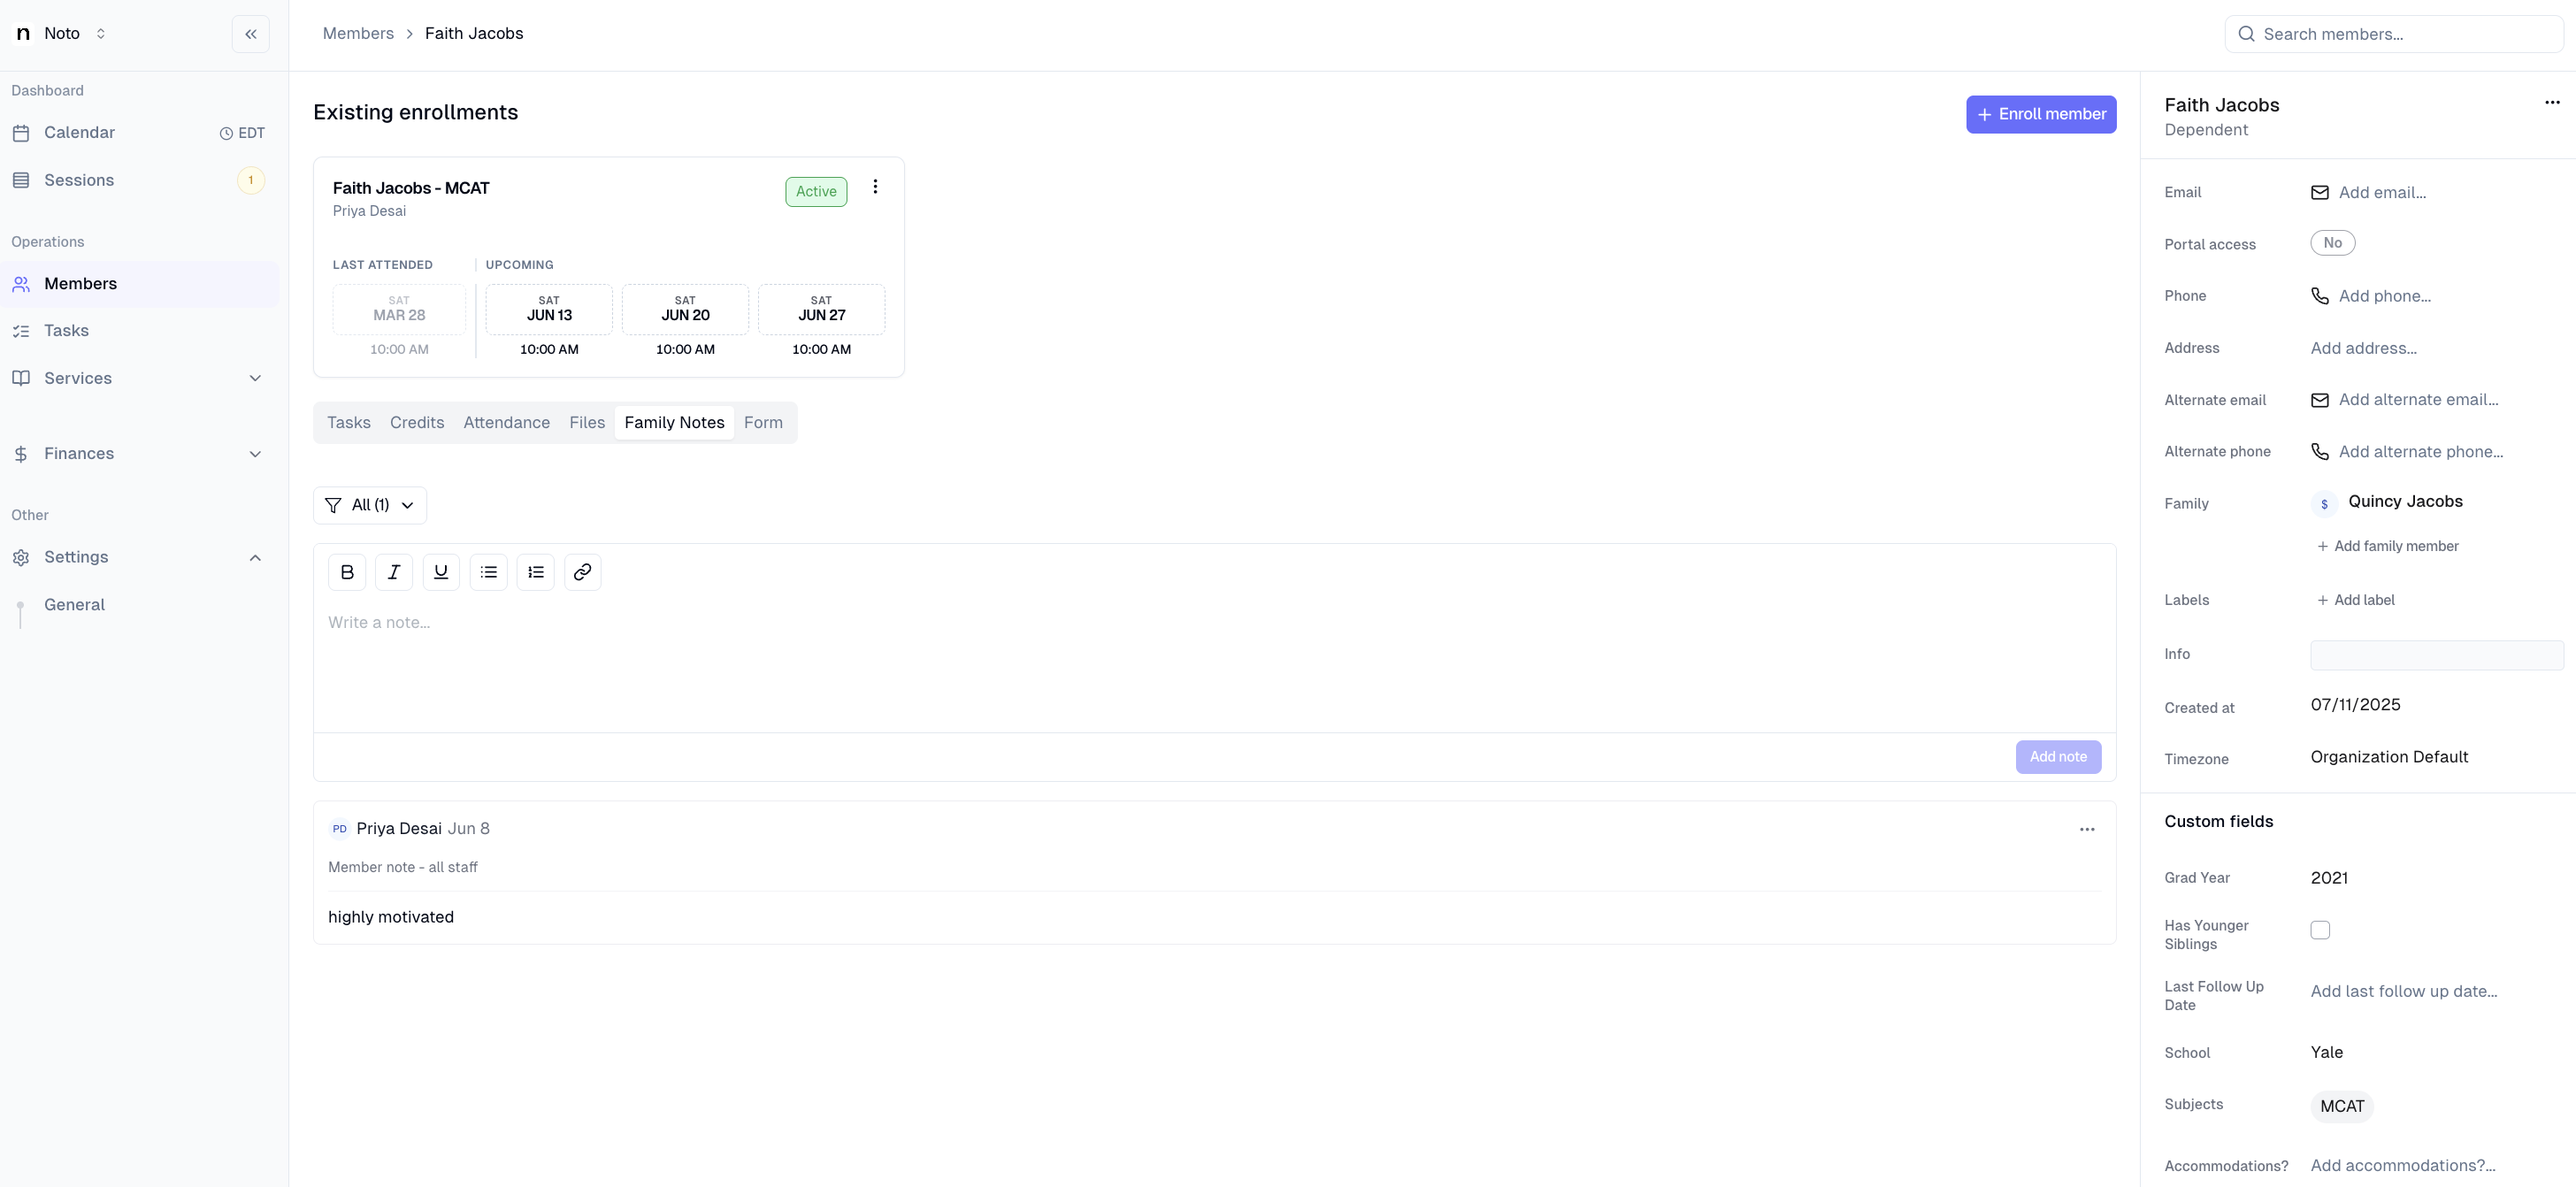
Staff can view profile information and custom fields for each of their students. They can also view forms and any notes not marked as Admin Only.
Adding, Editing, and Deleting Sessions
Adding a session (from the staff portal):
From the Calendar, click Create Event or click and drag on the calendar.
Select the student and enrollment. If the student is already enrolled, their existing enrollment option will populate automatically.
Confirm the date and time. If a session is recurring, toggle "Recurring session", select the start/end date, and select the day and time of recurrence.
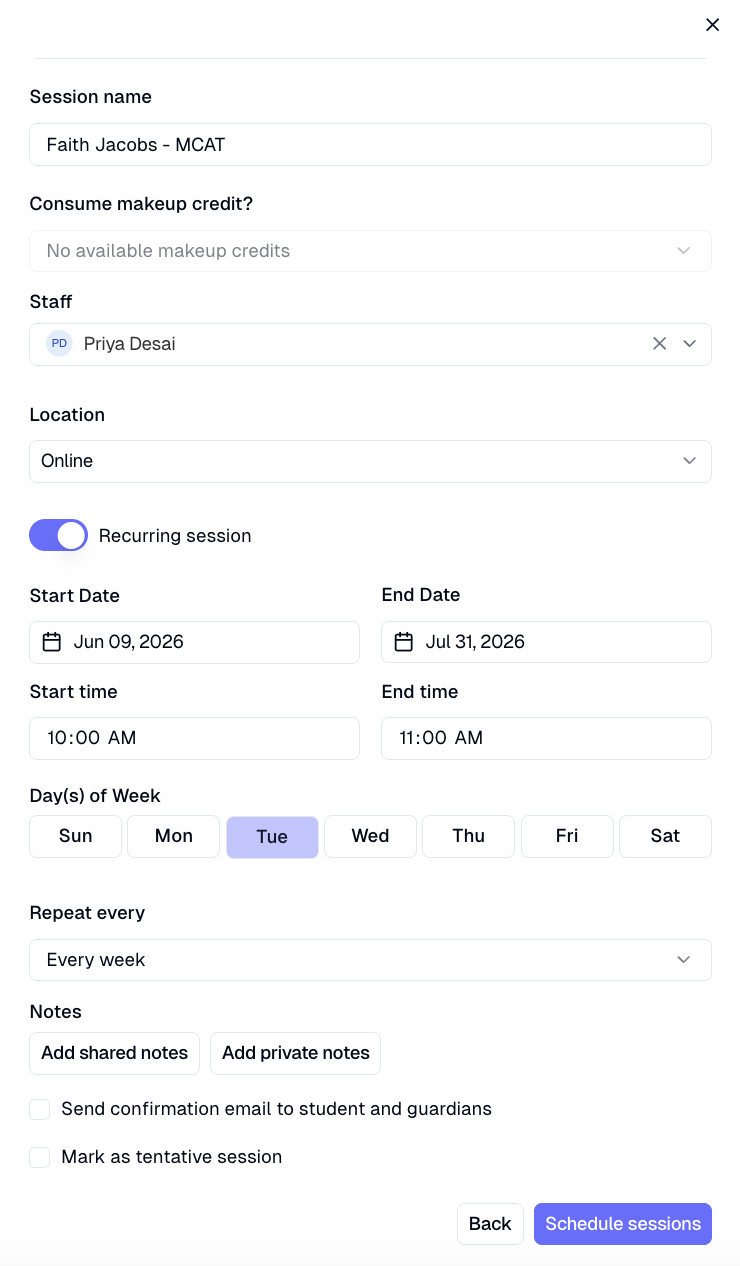
Click Schedule session(s). The session(s) will appear on the calendar.
Editing a session:
On the schedule, select the event to edit, click the 3 dots in the top right, and click "Edit".
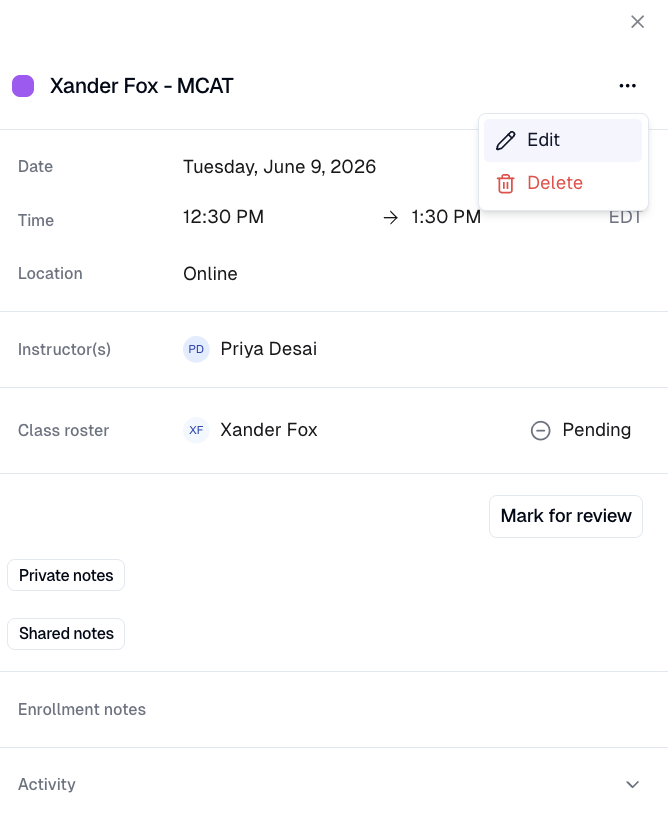
Make any changes to time, date, or location and Save.
If editing a recurring lesson, select This and following events to update the schedule going forward.
Select "Custom" when the schedule is recurring on multiple days/times to ensure the right sequence of events are updated.
Deleting a session:
On the schedule, click the event you are making edits to, click the 3 dots in the top right, and click "Delete".
Blocks (placeholder events) can also be created through the same flow. Blocks appear on the staff portal calendar but do not trigger attendance or payroll.
Session Notes
Notes can be added to any session and optionally shared with students and families.
Click on any session to open it in the sidebar.
Click either "Shared notes" or "Private notes" and add notes. You can also add notes from templates defined by the business admin:
Shared — visible to the student and their guardian in the member portal.
Private — visible to staff and admins only.
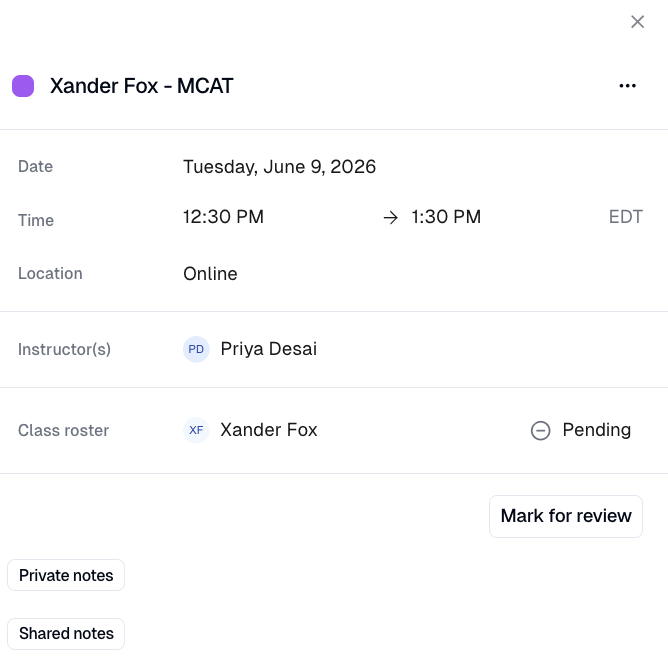
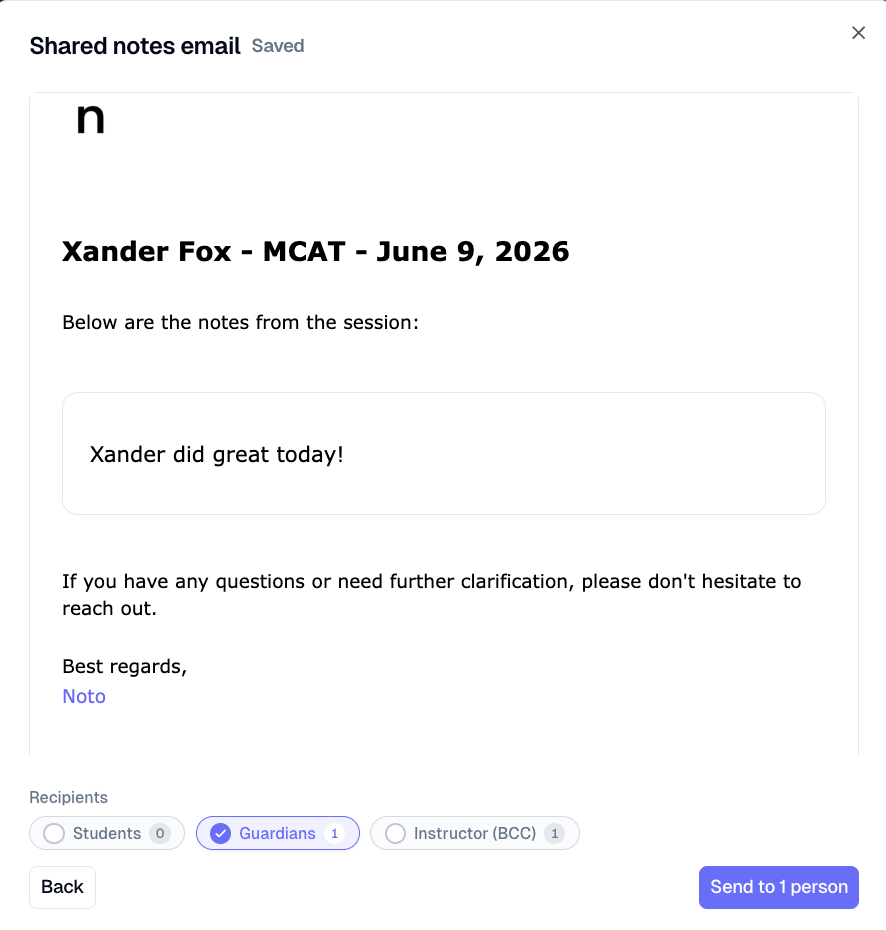
Notes will autosave onto the session and onto the member's profile. To send notes, click Email and select if this should be sent to the student and/or the parent.
Some businesses require notes to be submitted as part of taking attendance. Check with your admin on whether this is required at your school.
Mark for Review
"Mark for Review" is available on any session in the staff portal. Staff can use it to flag a session that needs admin attention — for example, if there's a question about attendance, a billing discrepancy, or something unusual that happened during the session.
Click on the session from the home schedule view to open it.
Add any notes and select Mark for Review.
The session will be flagged for your admin to follow up on.
Marking Attendance
Attendance must be marked after each session. It directly determines whether a client is billed and whether a staff member is paid.
After a session has occurred, click on it in the schedule. A sidebar will open.
Under Class Roster, mark the attendance status for each student:
Pending — default state; nothing happens until changed.
Present — client is billed; staff is paid.
No Show — client is billed; staff is paid.
Late Cancelled — client is billed; staff is paid.
Cancelled — client is not billed; staff is not paid.
Click Save Changes.
Until attendance is marked, the session will remain in Pending status and no billing or payroll will be triggered.
Payroll
After attendance is marked on a session, that session automatically appears in the staff member's Earnings tab in their portal.
From the staff portal, navigate to the Earnings tab.
Staff will see a summary of their total hours worked and gross earnings for attended sessions.
To review earnings for a specific time period, adjust the date range at the top of the page.
Noto calculates and displays expected earnings but does not disburse funds. Actual payment is handled by your admin through a separate payroll process.
Setting Availability and Unavailability
Staff can set their regular working hours and block off specific times directly from their portal. Admins can see this availability when scheduling new enrollments.
Setting regular availability:
From the staff portal, navigate to Settings -> General -> My Profile.
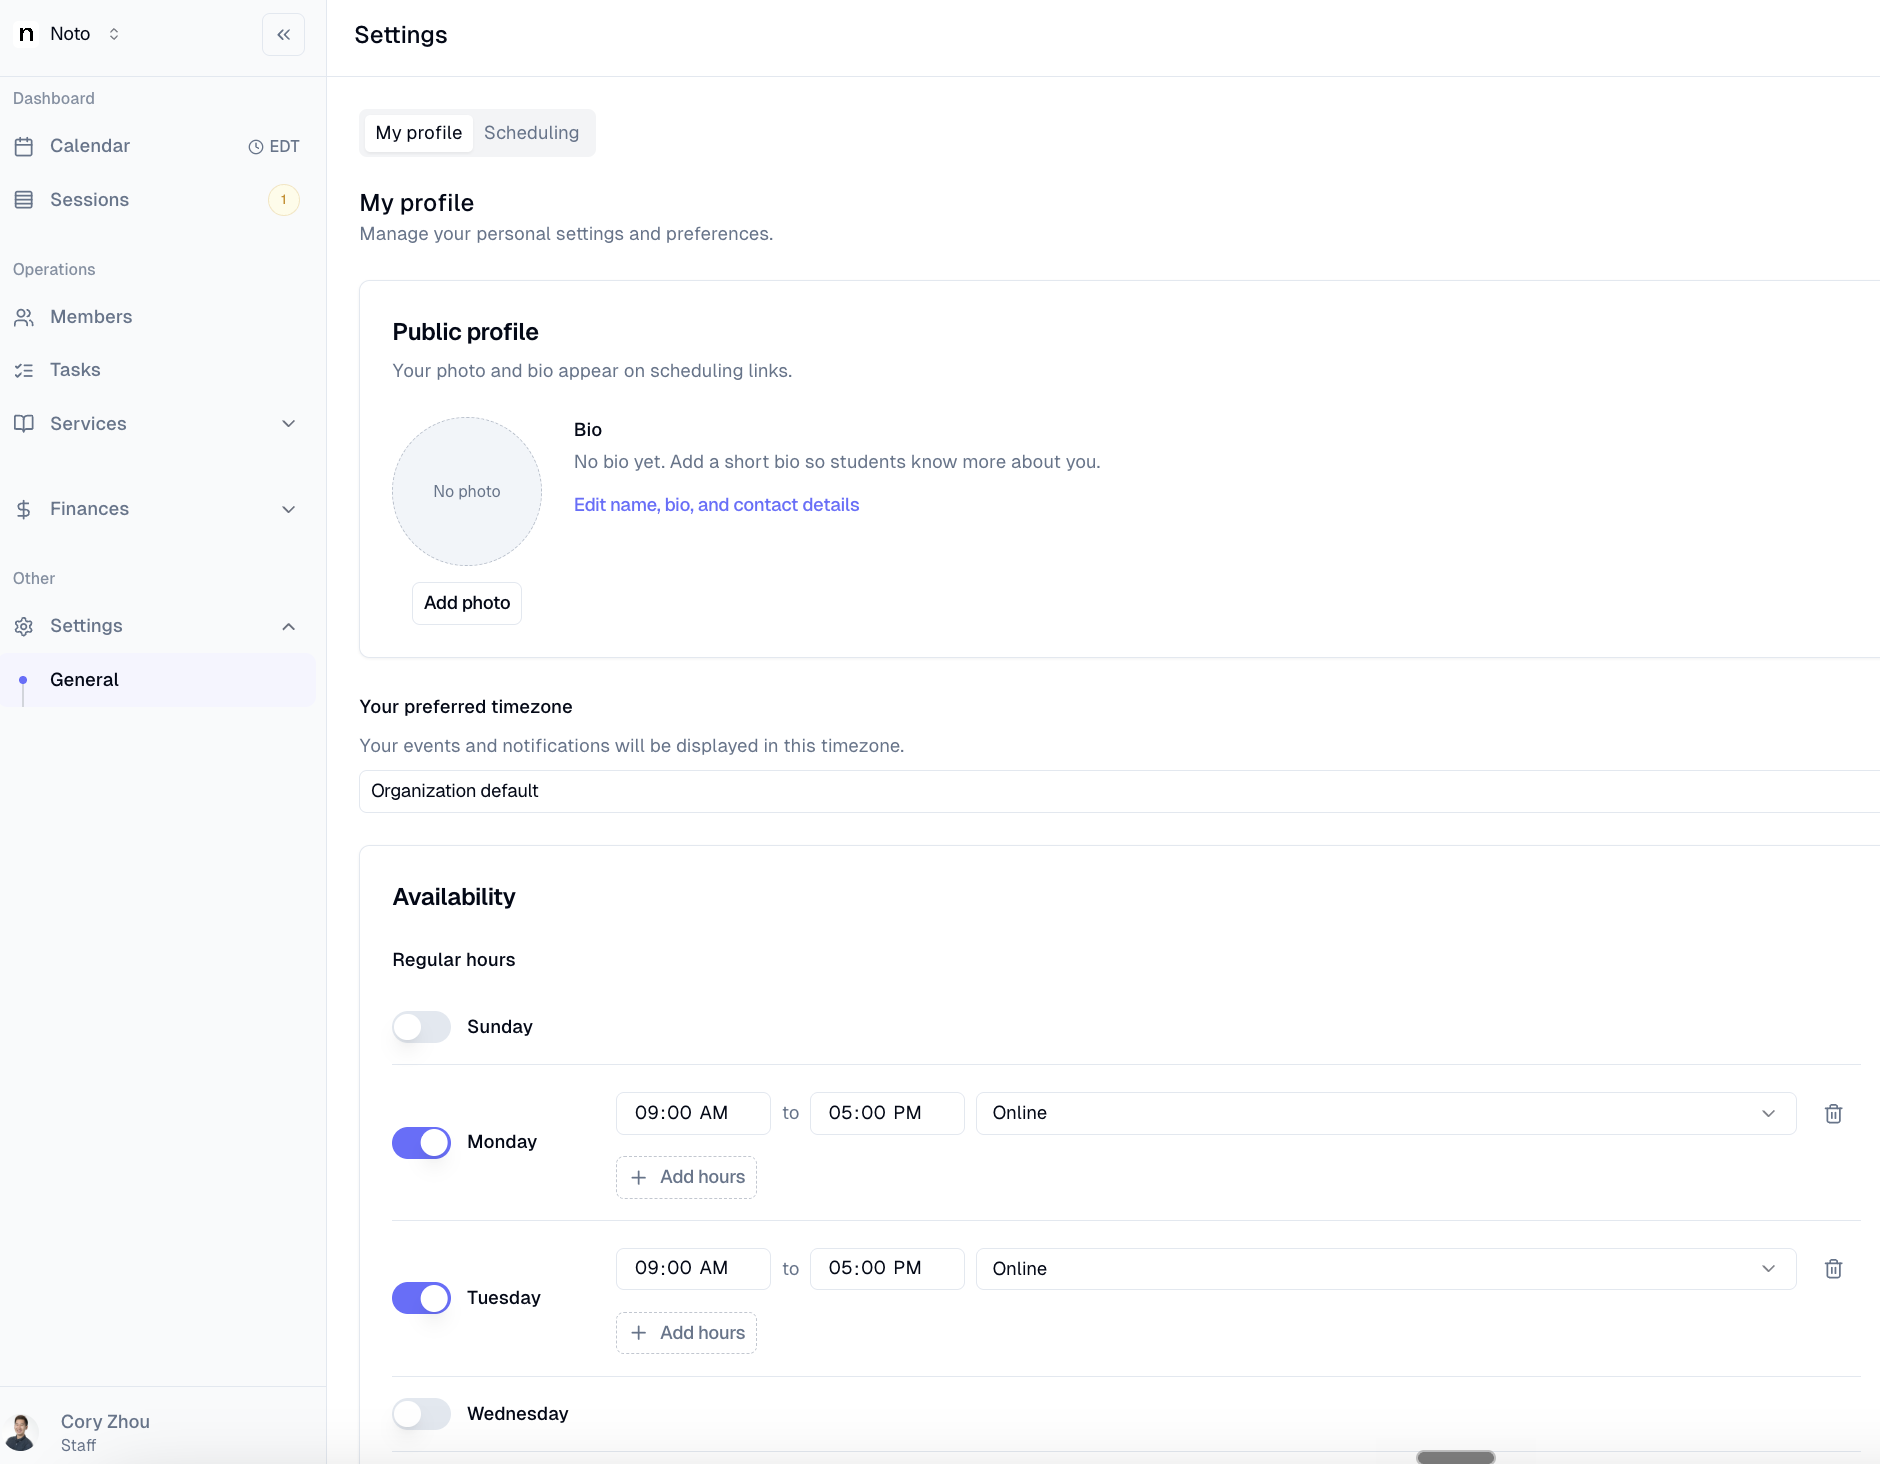
Set recurring working hours by day of week — these represent the times the instructor is generally available to be scheduled.
NOTE: Availability can be set by admin OR staff.
Click Save to apply.
Blocking off specific times:
On the same My profile tab, find "Date specific hours" and "Unavailable hours".
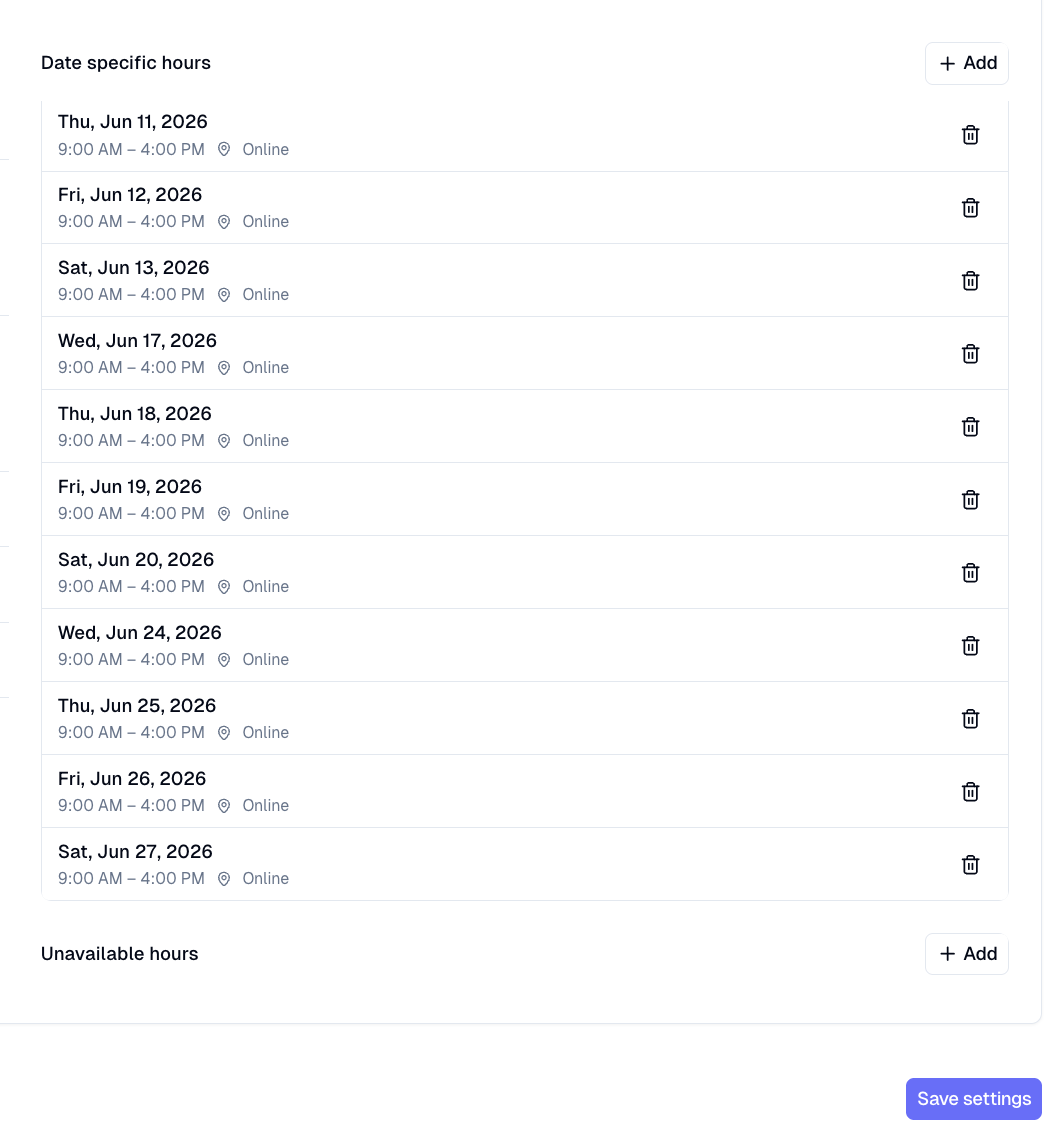
Add a block for that time slot. It will appear on the calendar and will be visible to admins when scheduling.
Blocks can also be added from the calendar view by clicking and dragging on the calendar and selecting "Block".
Syncing with Google Calendar:
Navigate to Settings -> General in the staff portal.
Follow these steps to connect your Google Calendar and select if you want this to be one-way or two way.
Once connected, all Noto sessions will sync into the staff member's personal Google Calendar and vice versa.