How the Product Catalog Works in Noto
Last updated: July 29, 2026
The Product Catalog is where you set up the things you sell - lesson packages, credit packs, registration fees, and more. Create an item once, then reuse it on forms, when adding credits to a member, or when adding a line item to their account. Think of it as a predefined set of menu-items that you can re-use.
Create catalog items
Where to go: Pricing → Product Catalog page
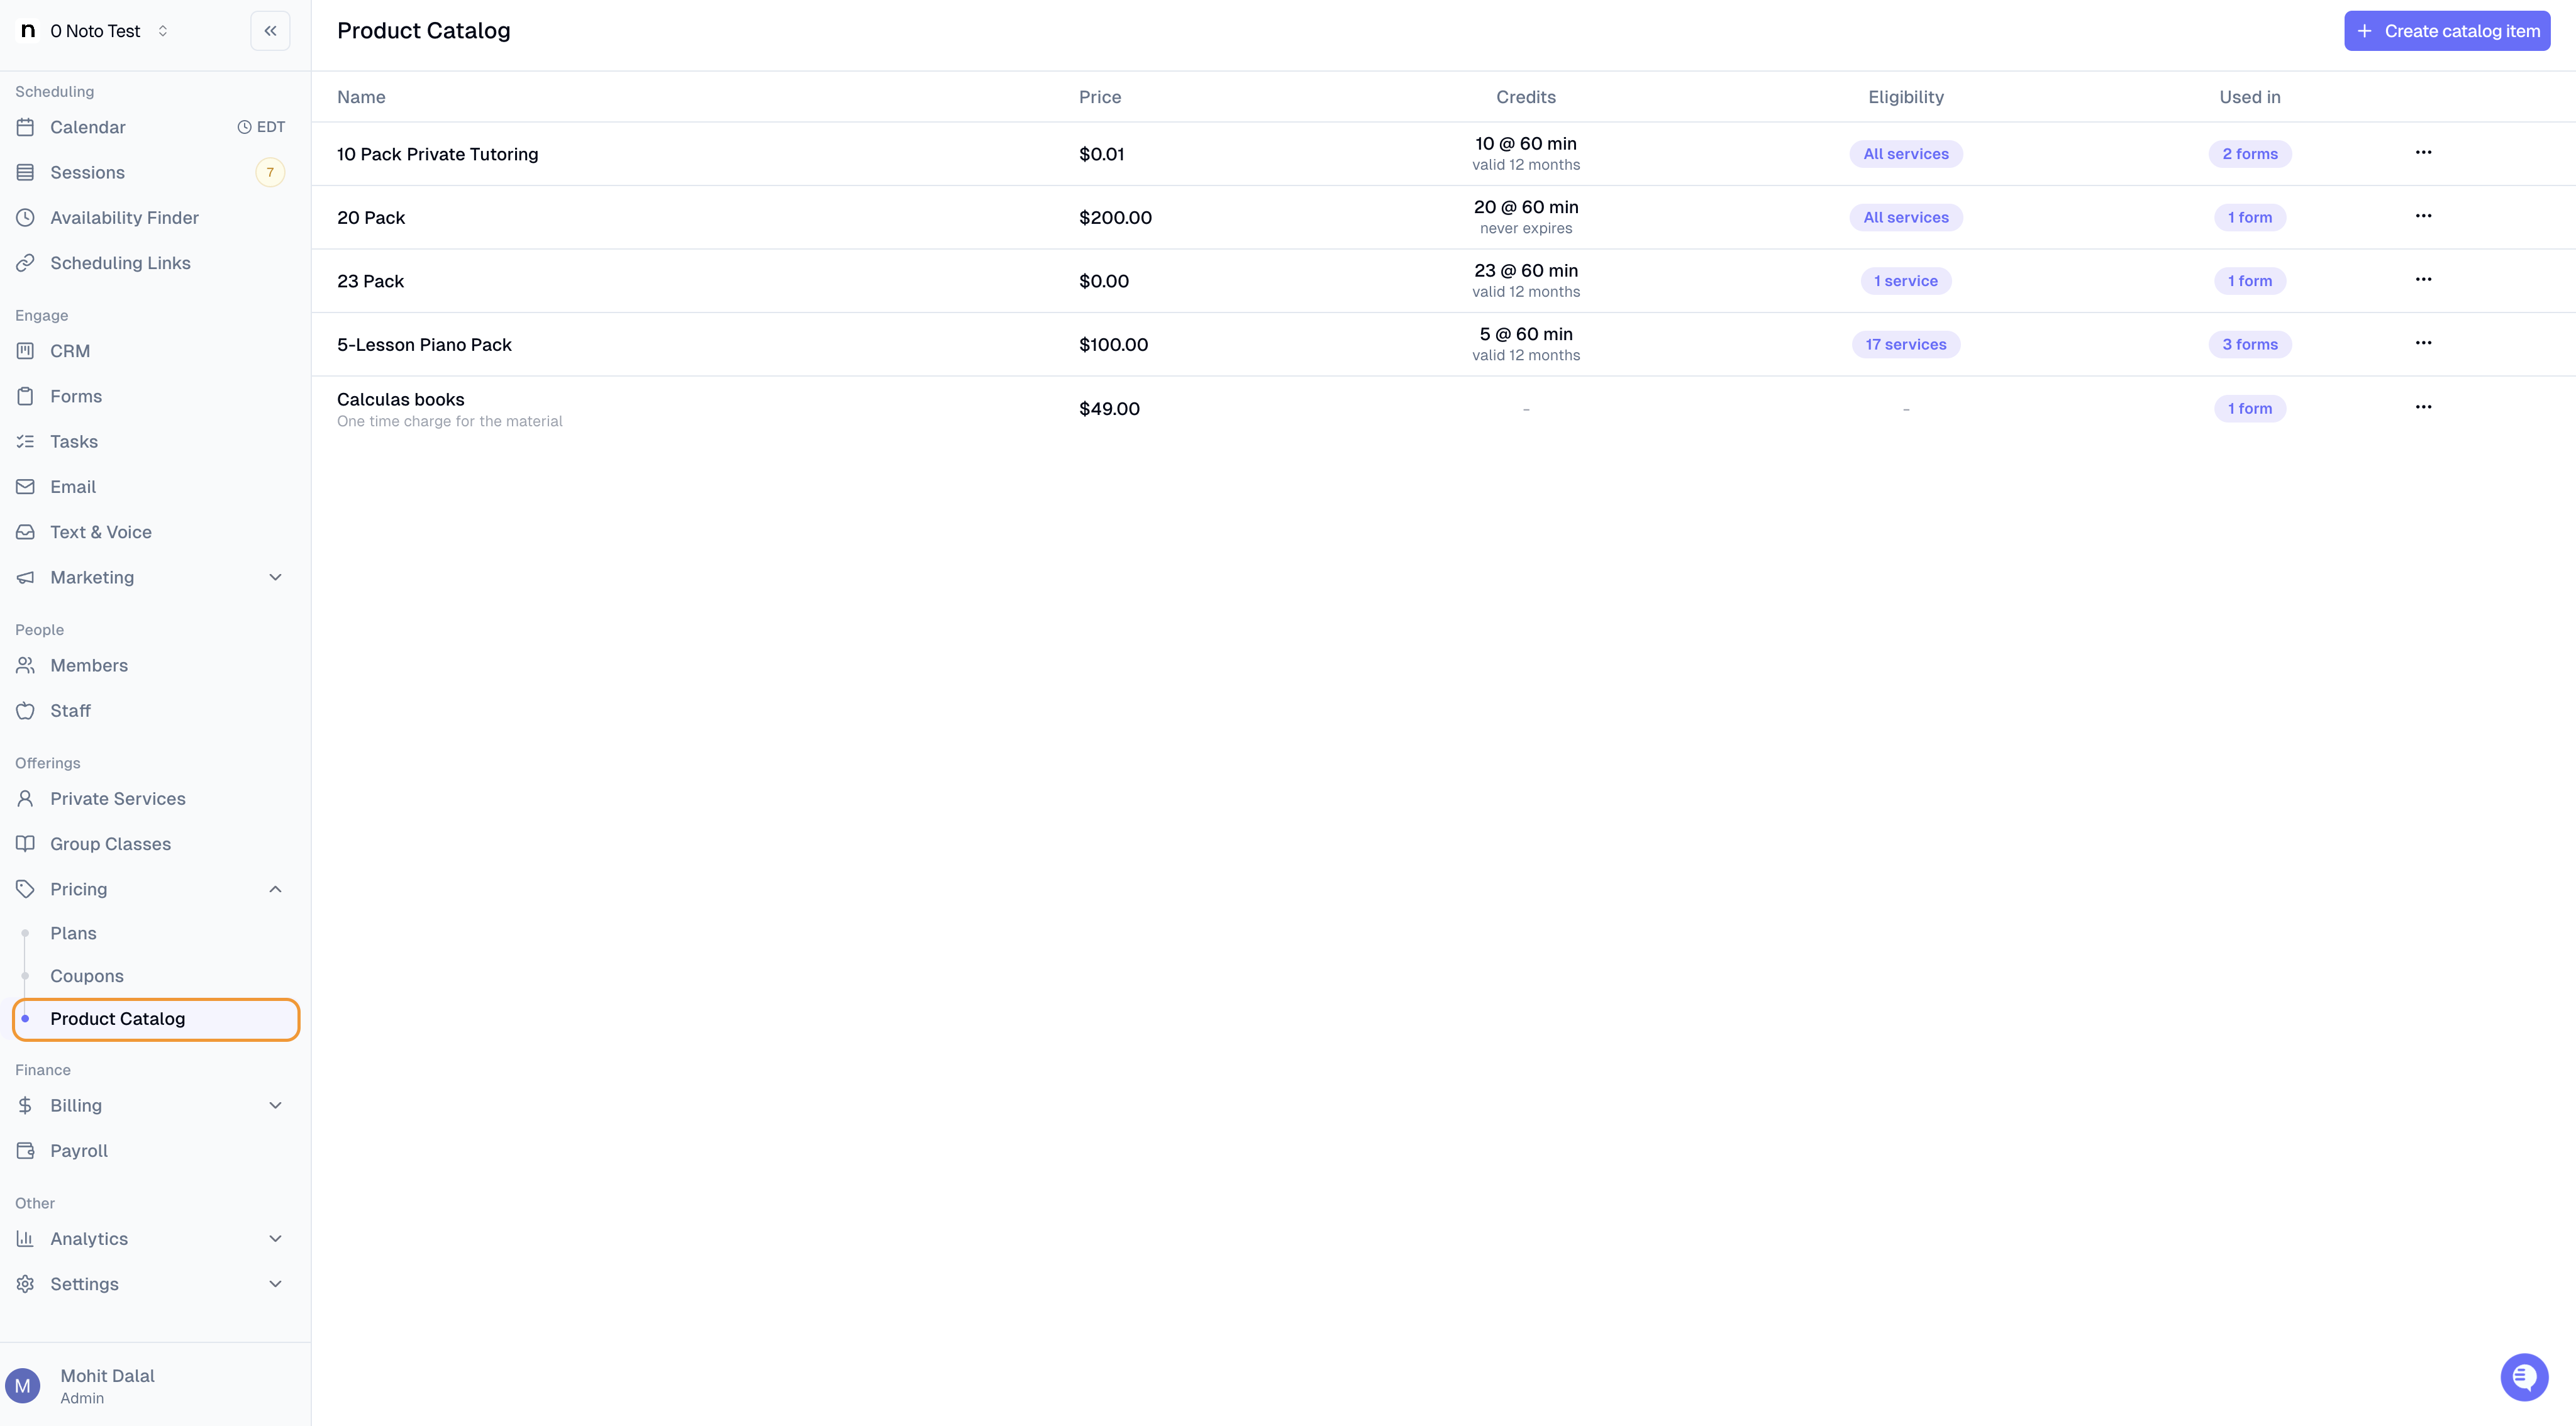
Click +Create catalog item button from top right.
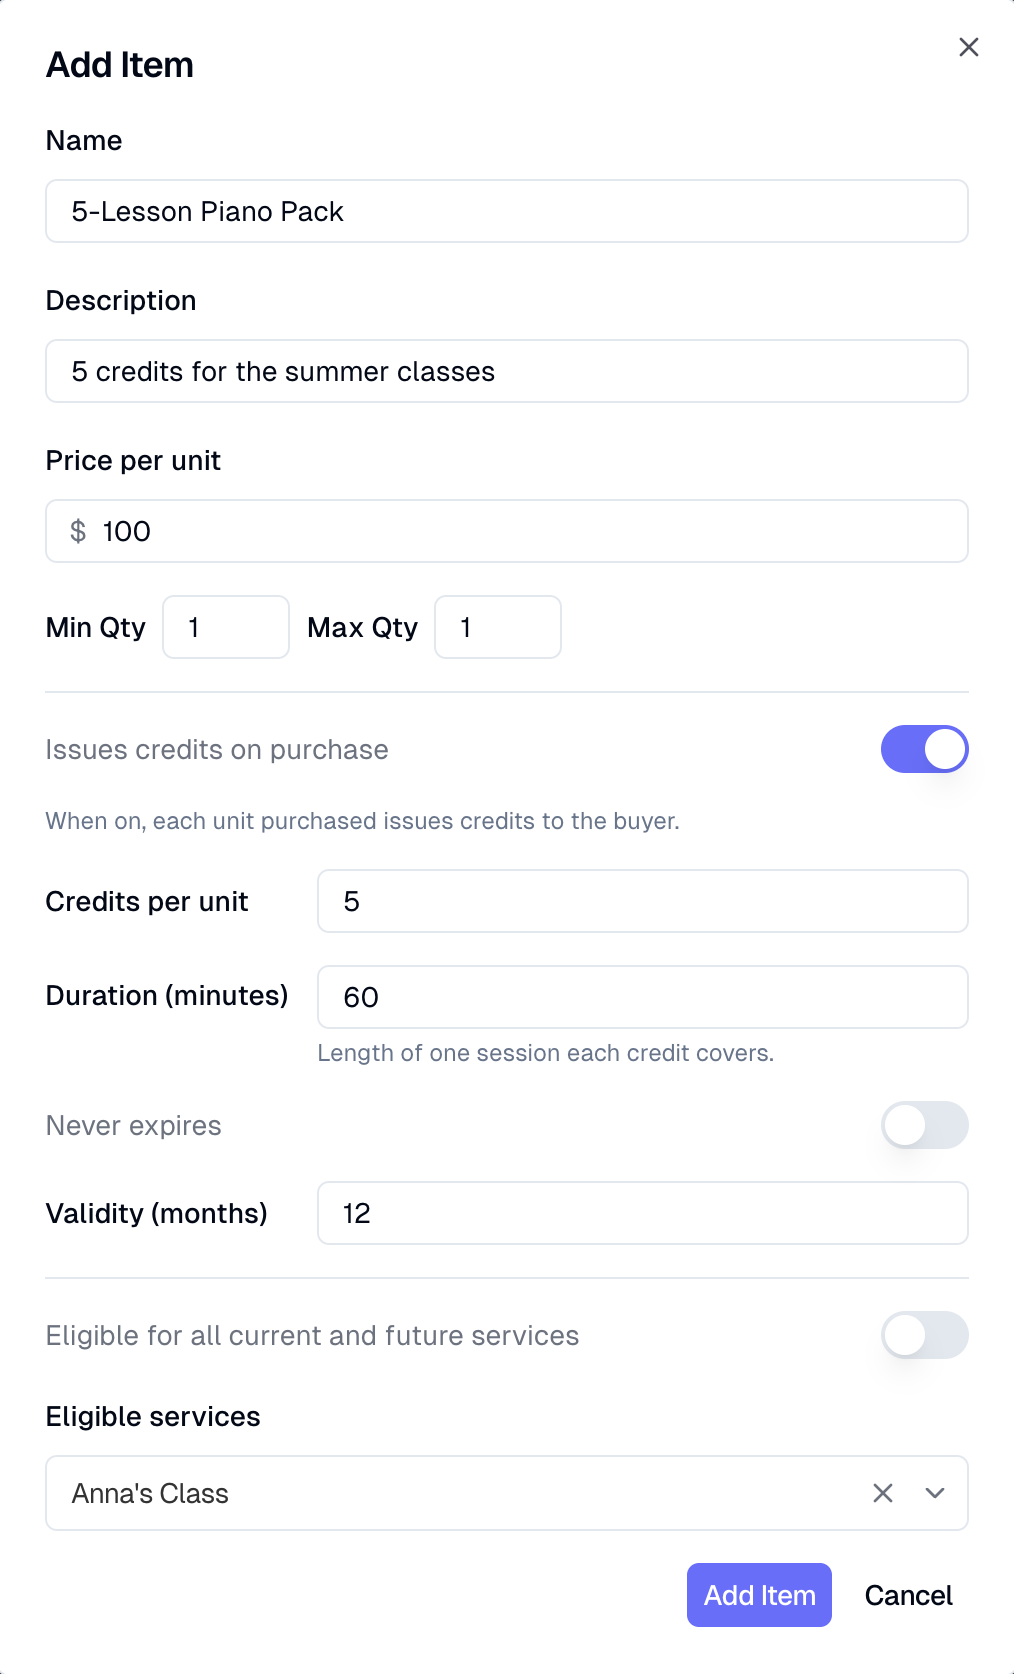
Give it a Name customers will recognize (e.g. "5-Lesson Piano Pack," "Summer Registration Fee").
Add an optional Description and set the Price per unit.
Set Min Qty and Max Qty if you want to limit how many a customer can buy at on the form.
(Optional) If this item grants the buyer credits (like a lesson pack), turn on Issues credits on purchase and fill in
How many Credits per unit
Duration (minutes) — how long each credit is good for (e.g. 60 for a one-hour lesson)
Whether credits Never expire, or how many months they stay valid
Which services the credits can be used for
Save by clicking Add Item.
Tip: Each item needs a unique name. To retire an item, Archive it - it will come off your forms, but past purchases and records stay intact.
Add items to a form
Where to go: Forms → open a form → Edit
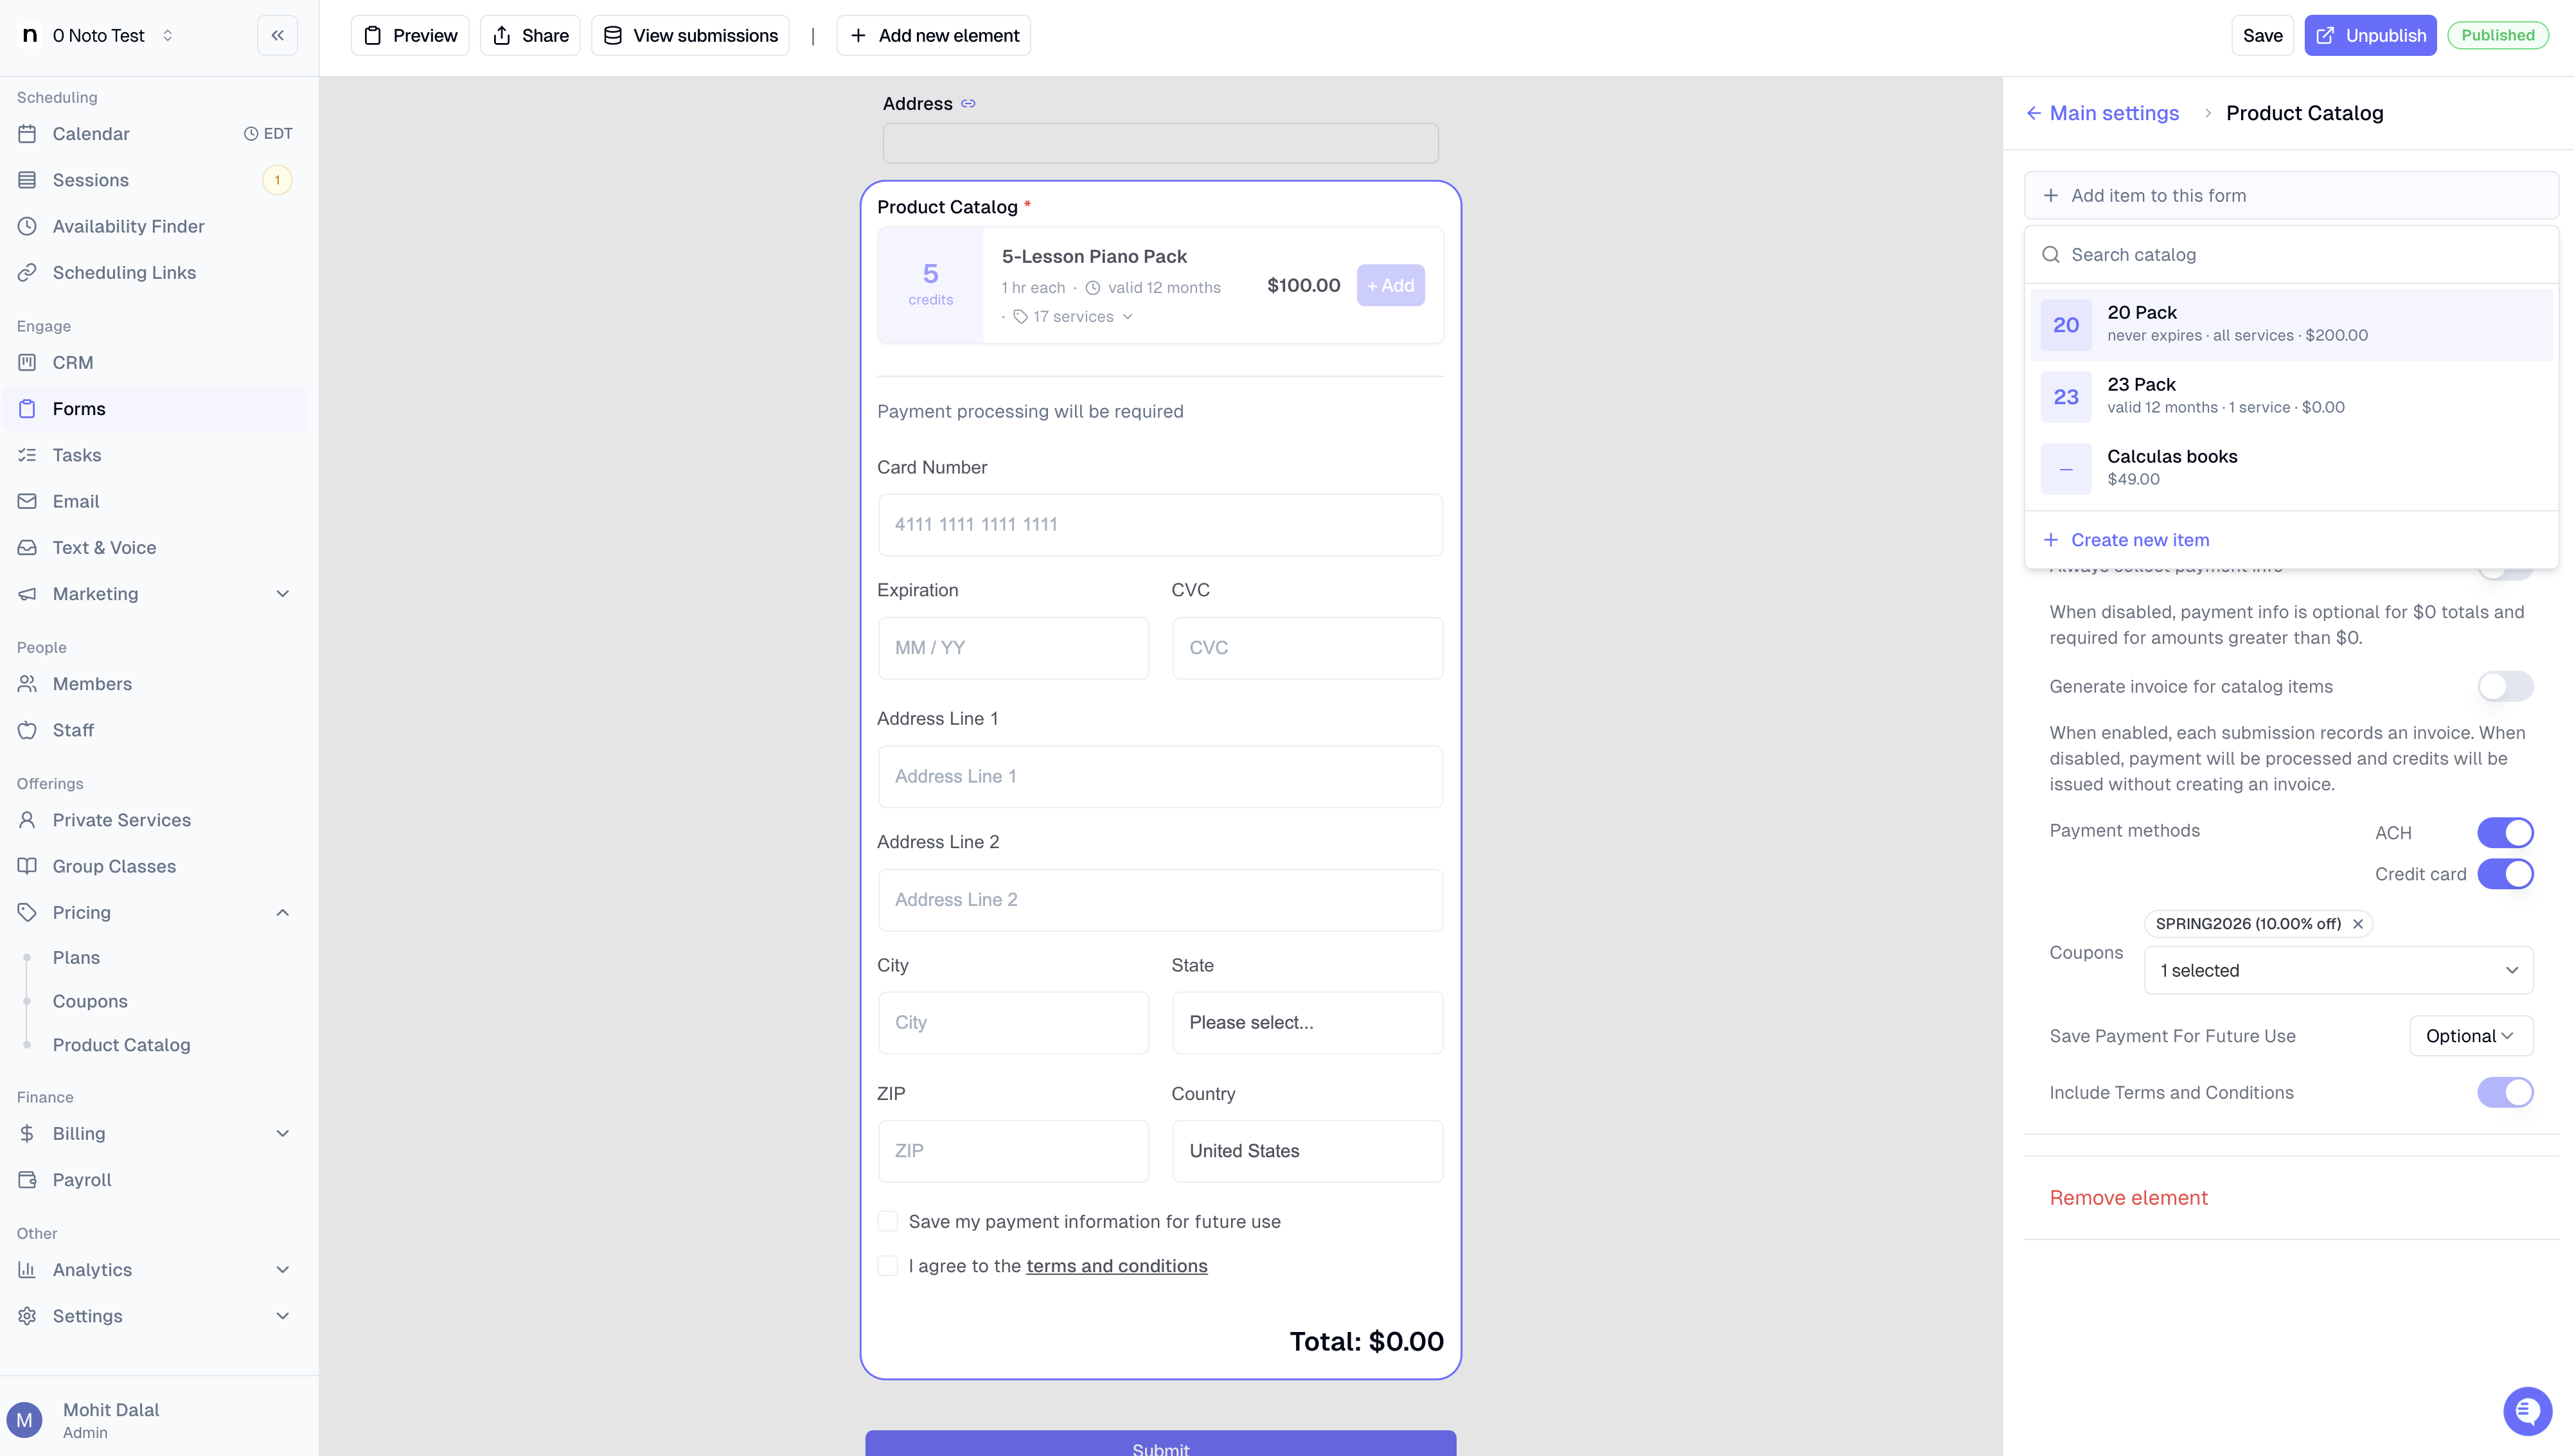
Click the Product Catalog block on your form.
In the sidebar, click +Add item to this form and pick an item, or choose +Create new item to make one on the spot.
Add as many items as you need, then Save the form.
Tip: Removing an item from a form doesn't delete it - it just stops showing on that form. If you edit an item here, the change applies everywhere that item is used.
Form settings worth knowing
With the Product Catalog block selected, you can also adjust:
Item Selection Required — must the customer pick at least one item to submit?
Generate invoice for catalog items — should Noto create an invoice when someone buys? (On by default.)
Payment options, coupons, and whether to save the customer's card for later
When someone buys credits on a form
If a customer buys a credit-based item through a form, their credits are added automatically — no extra steps for you.
Credits show up on the member's profile under the Credits tab.
Whatever settings the item had at purchase time is what they get. Changing the catalog item later won't change credits already issued.
Add credits manually
Credits can be added and charged manually from the member's profile as well.
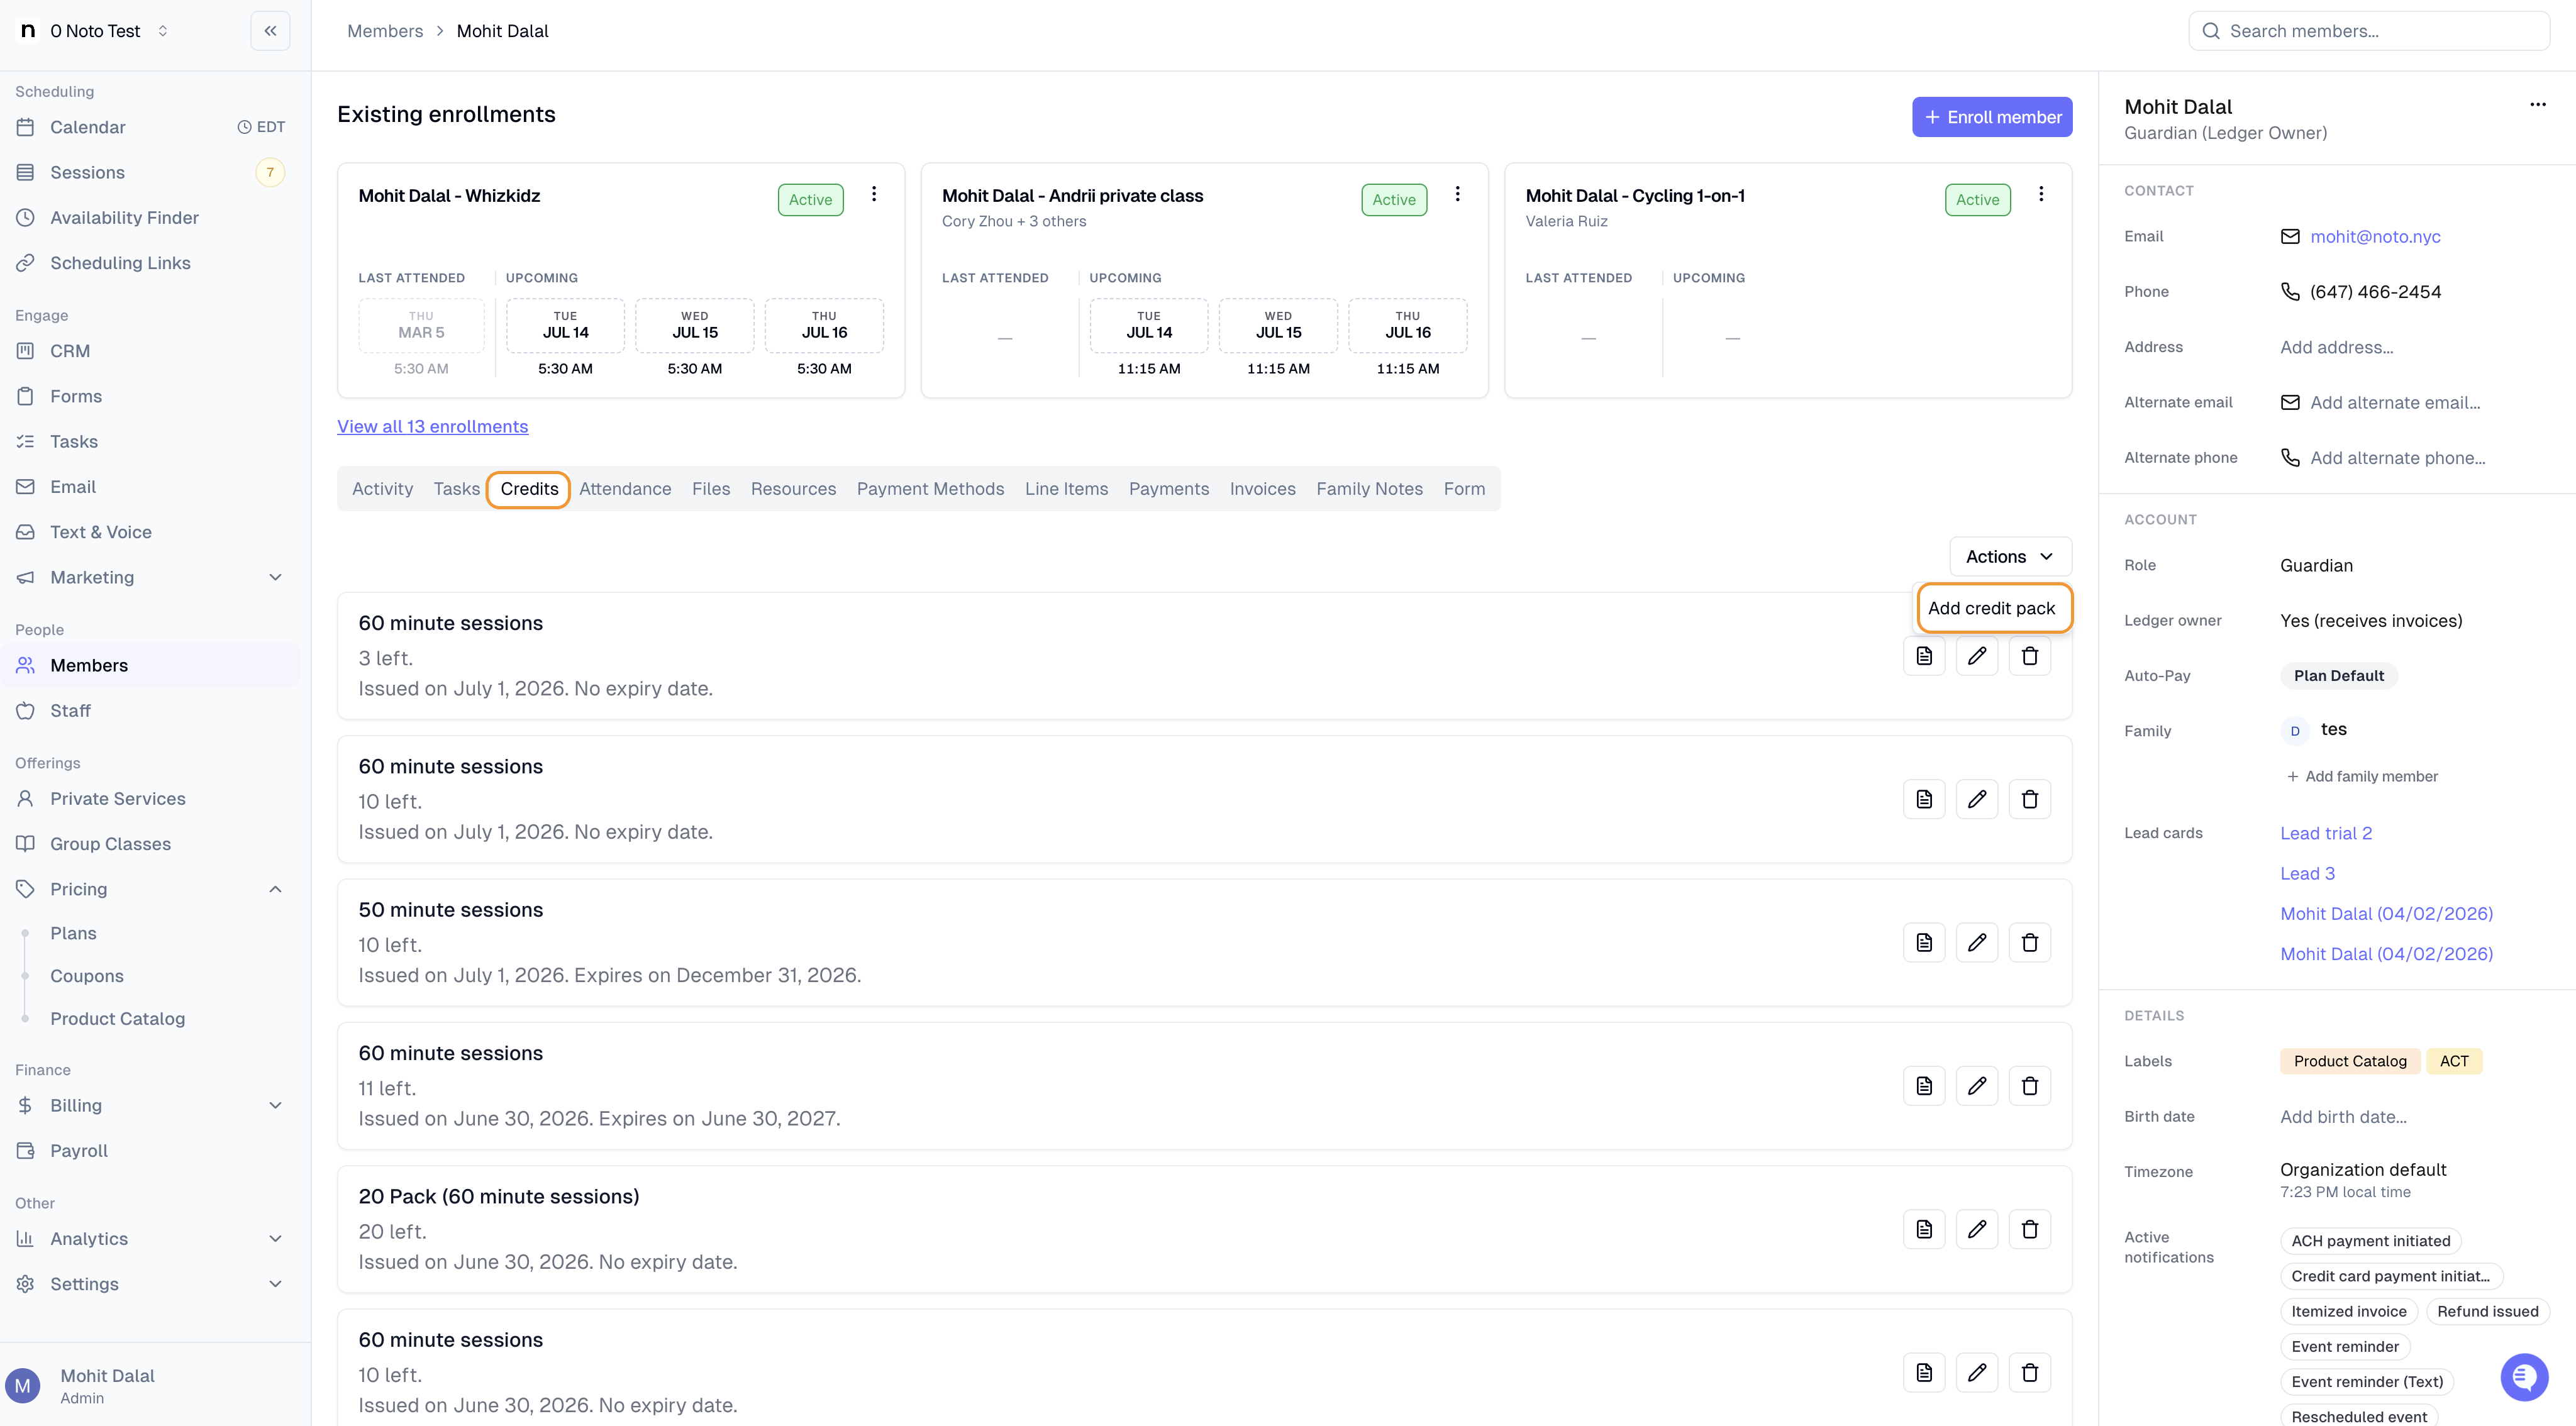
Open the member's profile → Credits tab (or go to Finances → Credits and click Add credit).
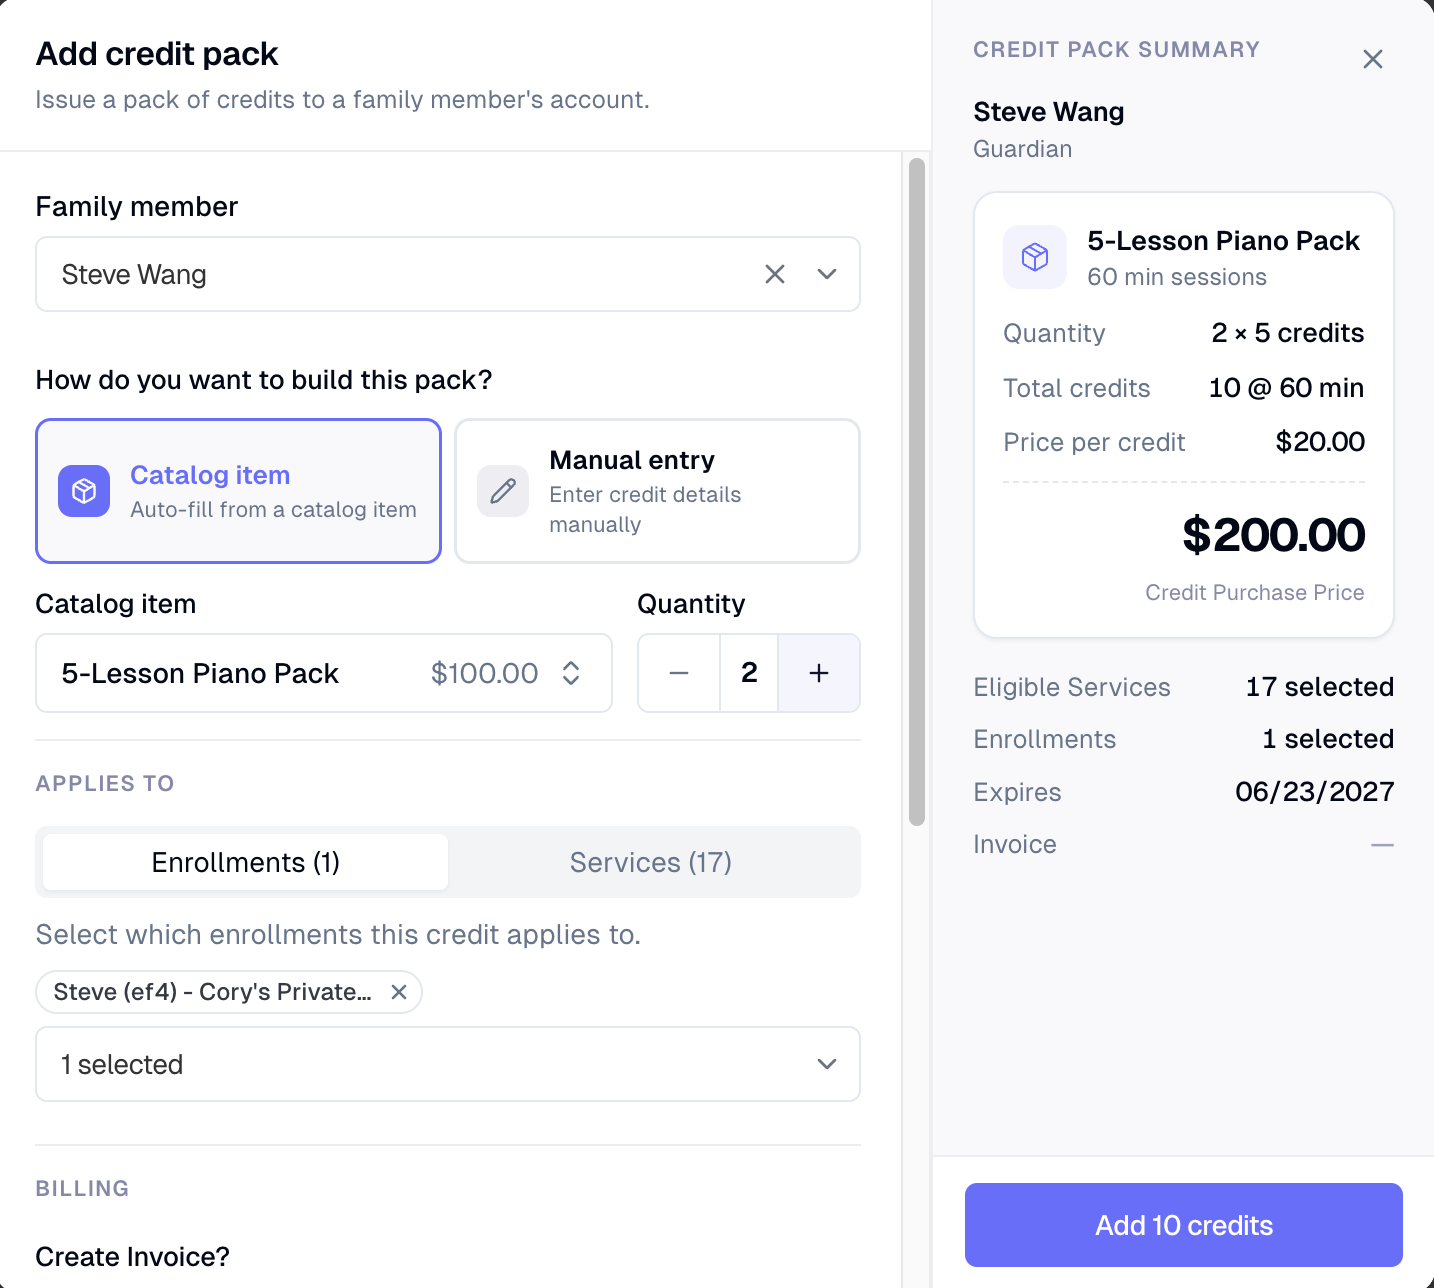
Click Actions -> Add a new credit pack.
Choose a Catalog item to start from something you've already set up, or Manual entry to create a custom package.
Select which services/enrollments these credits should apply to, and specify if an invoice should be created.
Click on "Add xx Credits" to save the credits and create the invoice.
Add a line item from the catalog
For items that aren't credit packs (like a registration fee), you can add them straight to a member's account:
On the member's Line Items tab, click Actions -> Add a new line item.
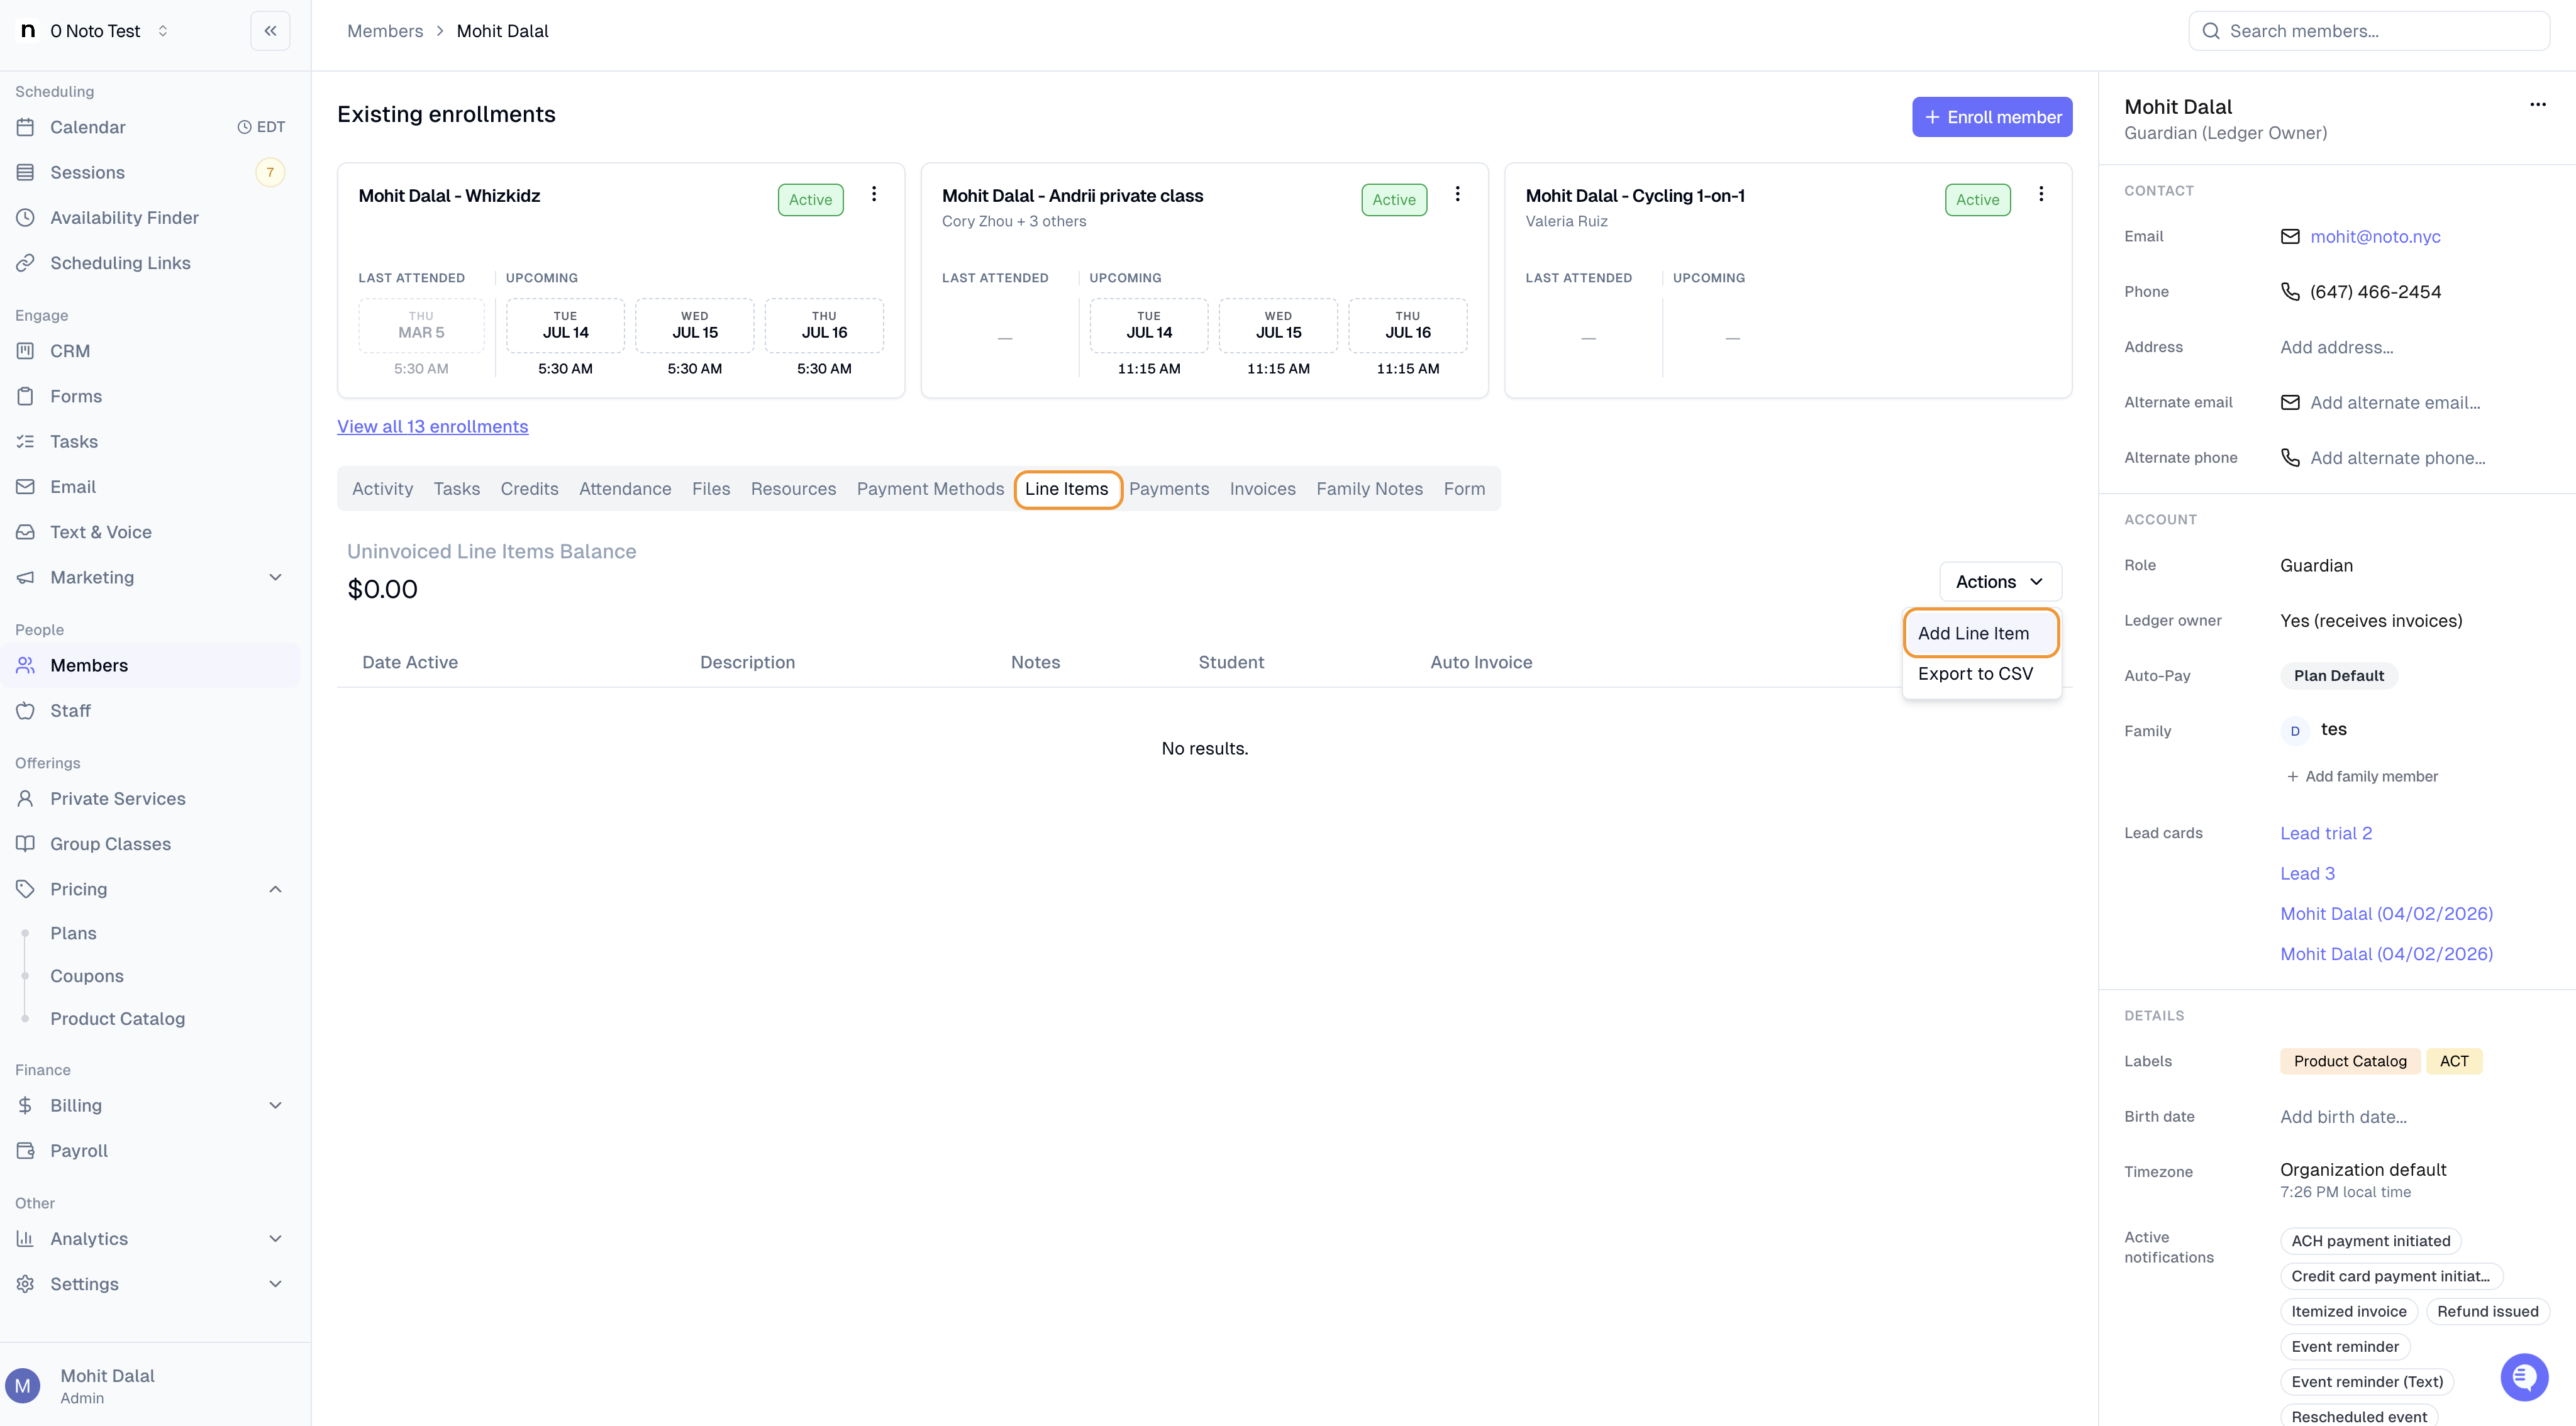
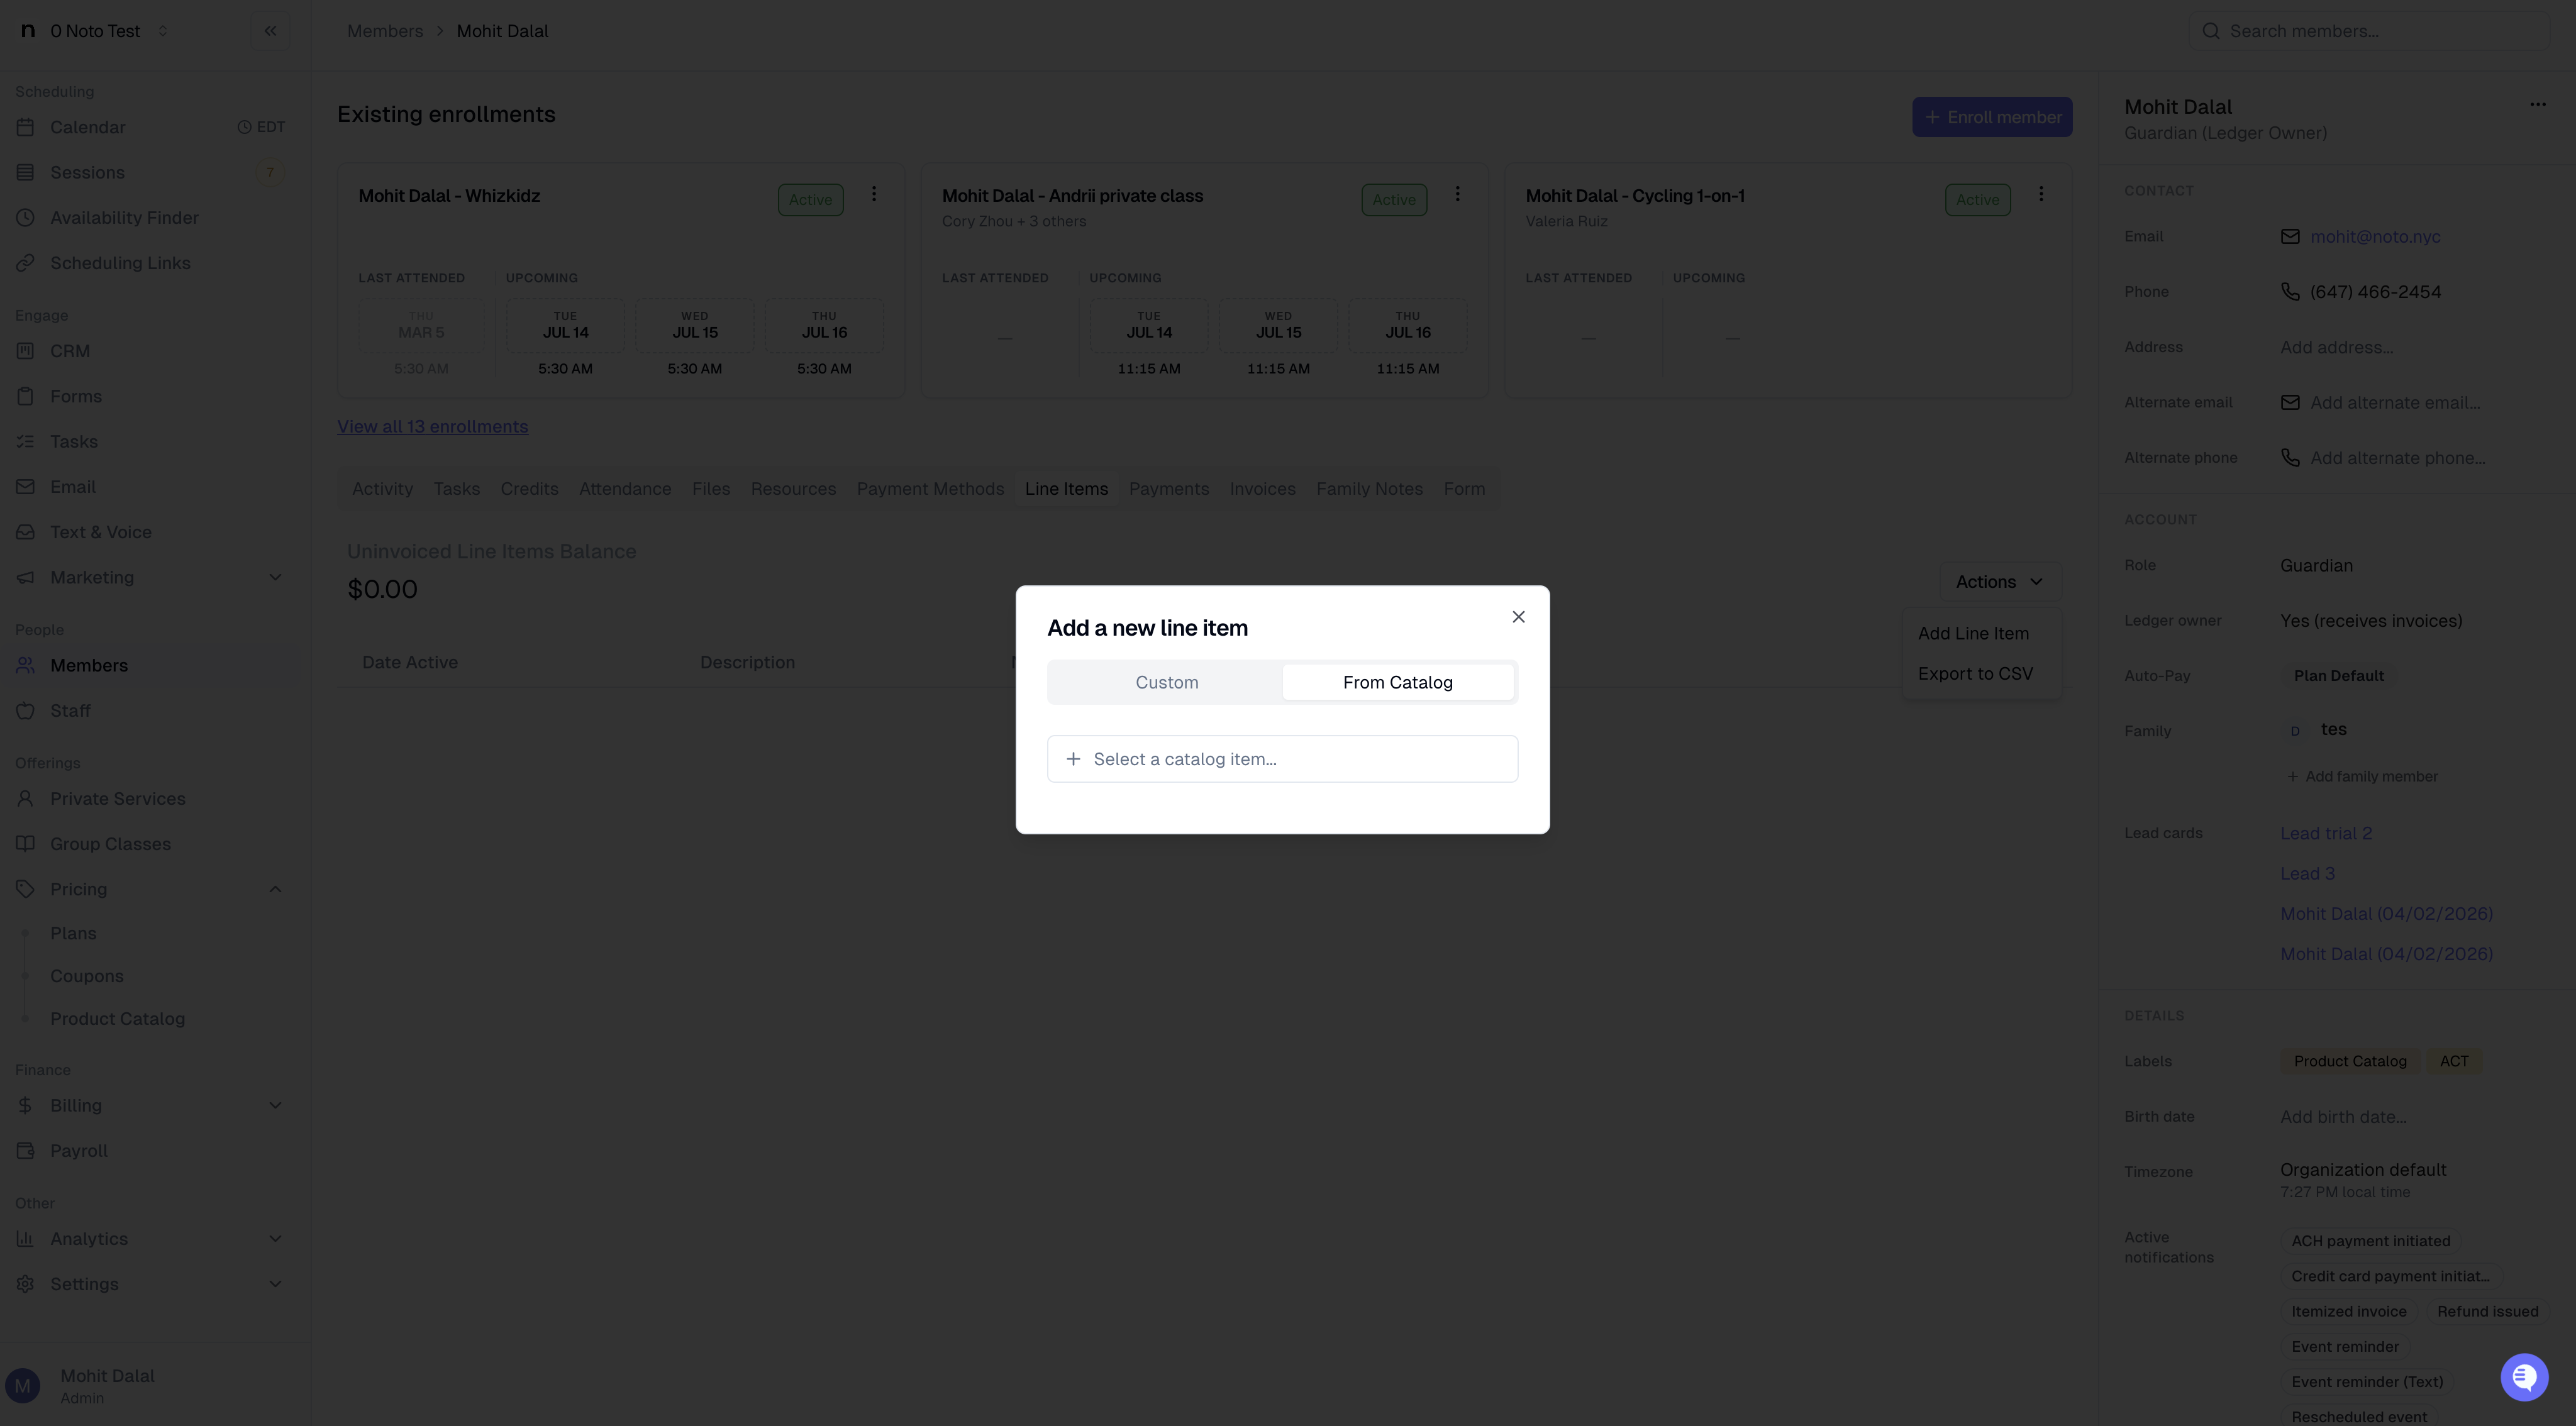
Open the From Catalog tab.
Pick your item — the price and description fill in for you. Toggle "Apply automatically to next invoice" to apply it to the client's next invoice. Otherwise, it can be added to a new existing invoice manually from the "Invoices" tab.
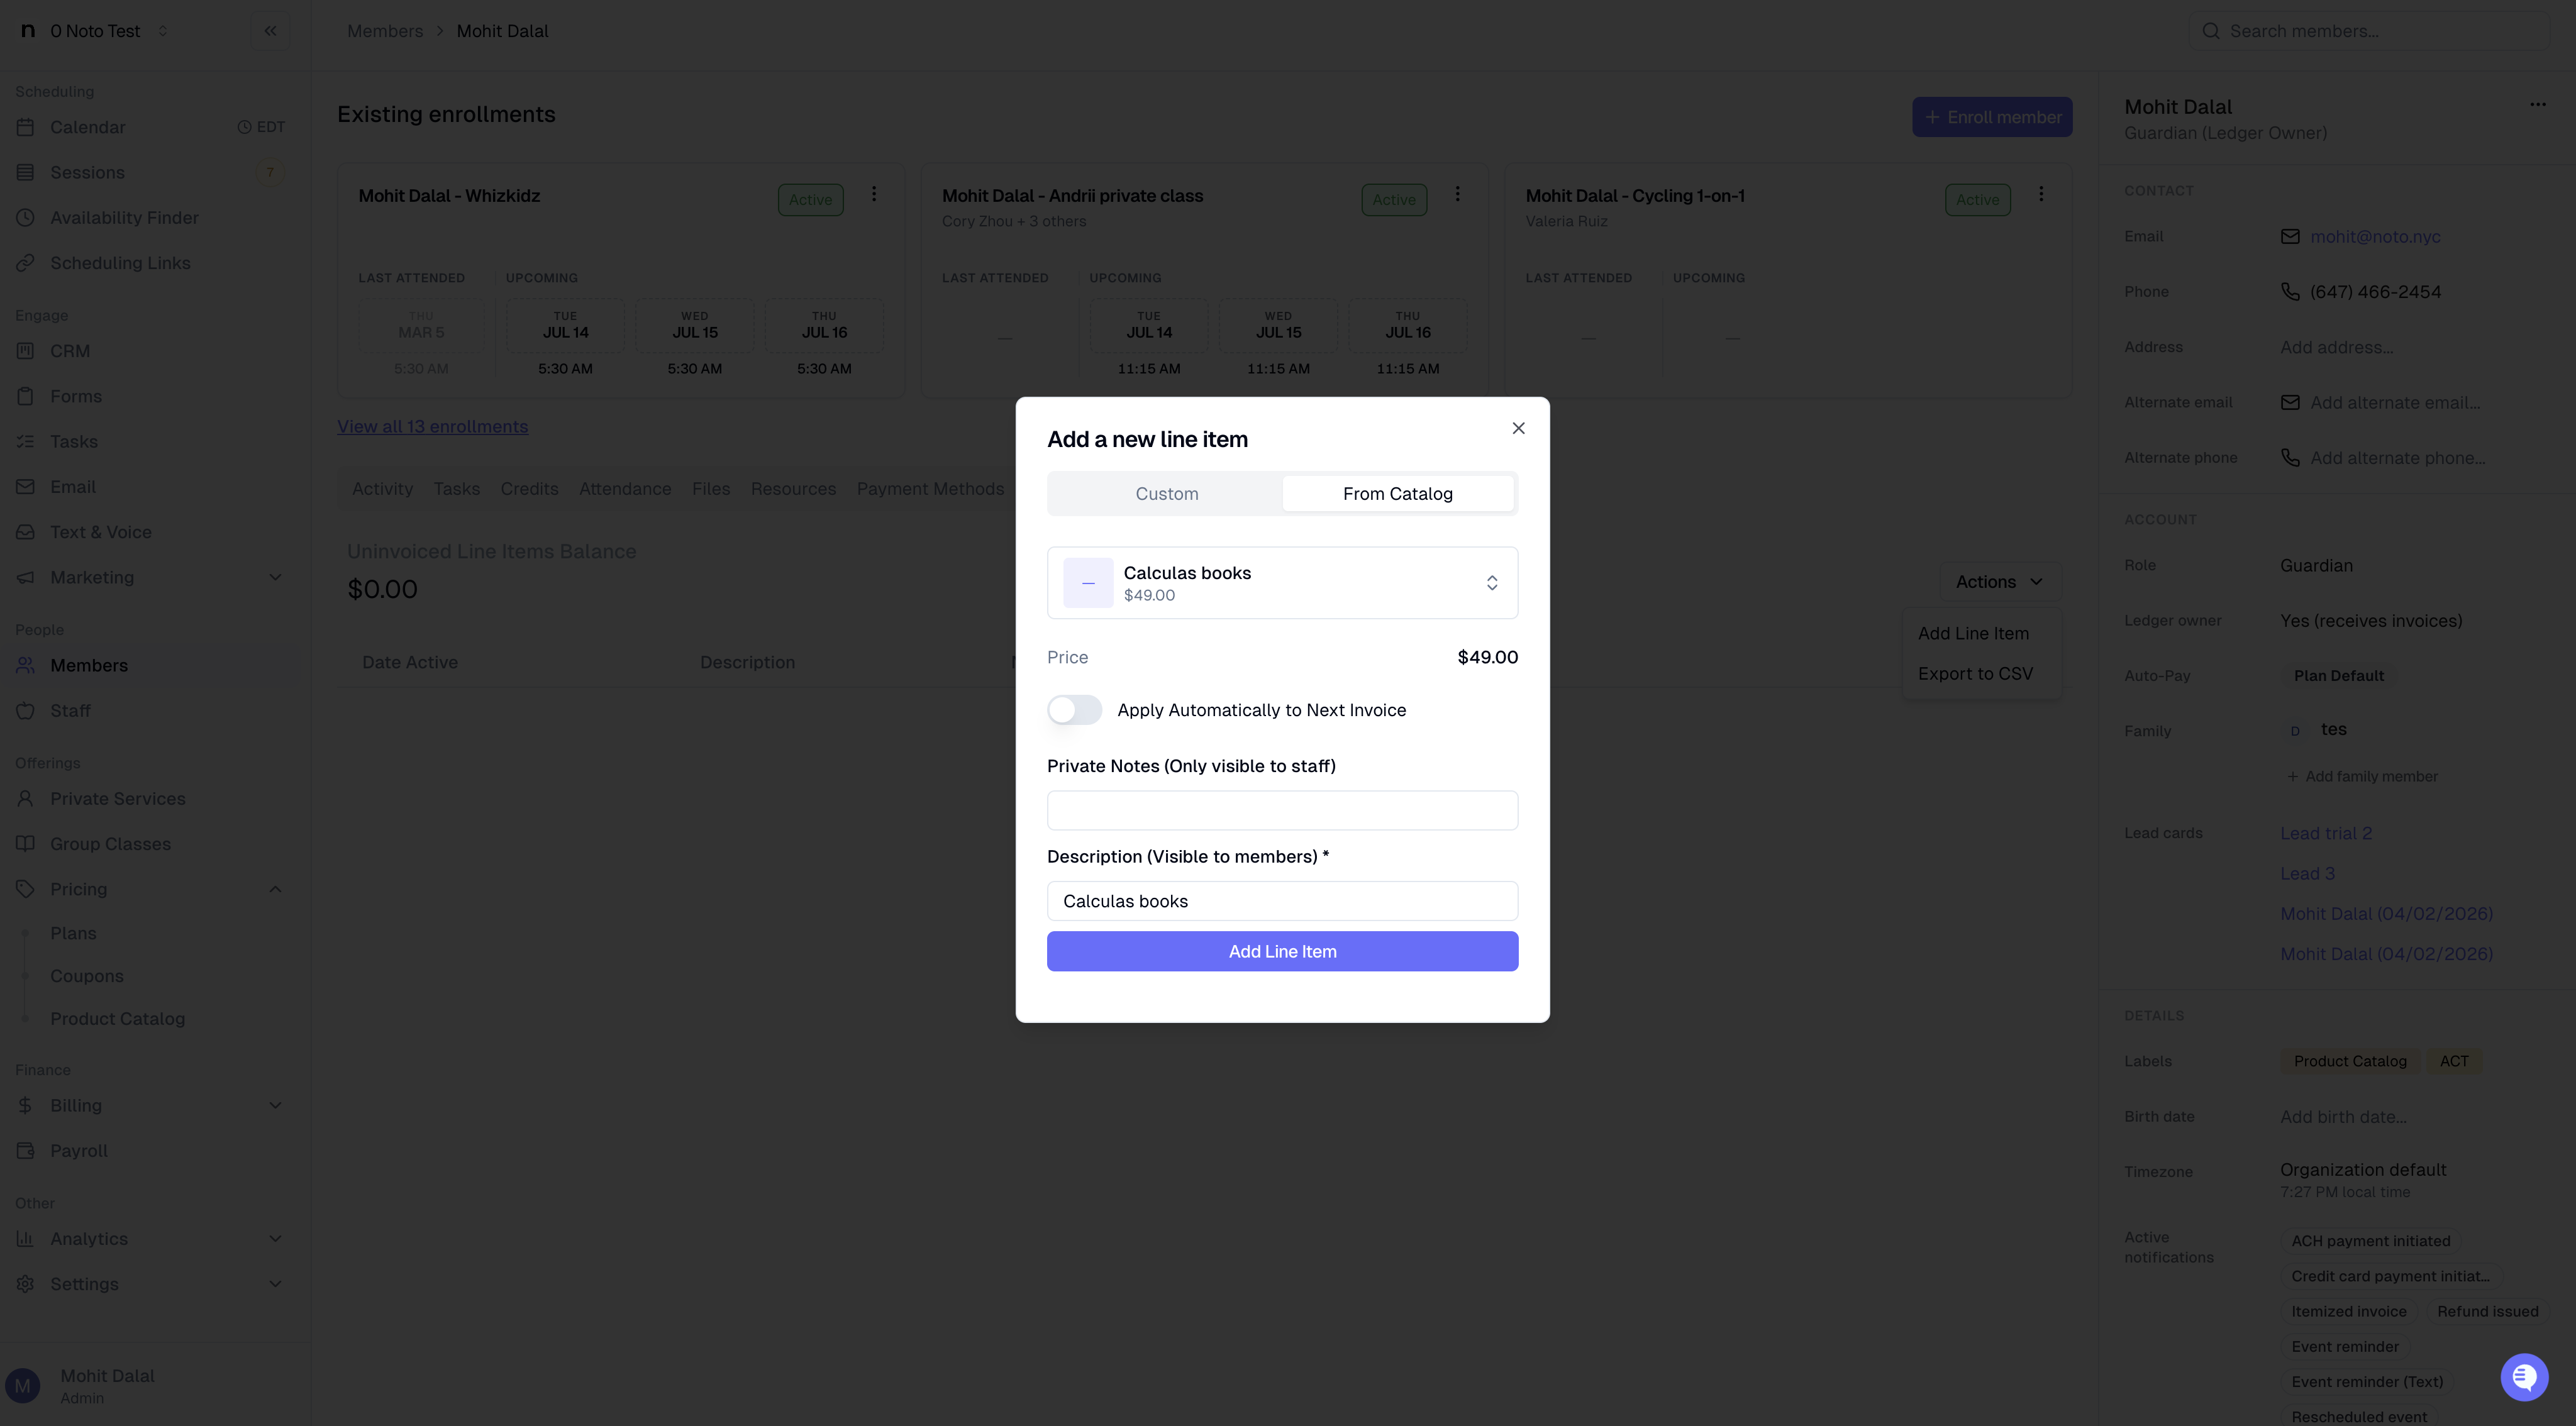
Click Add Line Item button to save.