How to use a Google Group as your organization email
Last updated: August 9, 2026
Noto can send organization email from a Google Group or alias, such as hello@withnoto.com.
To set it up:
Add and verify the address under Send mail as in Gmail.
Connect that Gmail account to Noto.
Select the Group or alias as your organization email in Noto.
Recipients will see the Group or alias as the sender, while Noto uses the connected Gmail account behind the scenes.
Set up your Google Group email
Connect your Gmail account to Noto, then choose the Google Group or alias you want to send organization emails from.
Follow the steps below to get everything ready.
Step 1: Choose the Gmail account you’ll connect
Choose the Gmail account that should manage your organization’s email in Noto - for example, mohit@withnoto.com.
If you want replies to your Group address to appear in Noto, this Gmail account must also receive those messages:
Add the Gmail account as a member of the Google Group.
In the Group’s membership settings, set Email delivery to All email. Learn how to manage your Google Groups subscription.
This allows messages sent to the Group to reach the connected Gmail inbox, where Noto can sync them.
If you don’t have permission to manage the Group, ask your Google Workspace administrator to make these changes for you.
Step 2: Add and verify the Group address in Gmail
Sign in to the same Gmail account you plan to connect to Noto.
Open Gmail settings.
Under Send mail as, click Add another email address.
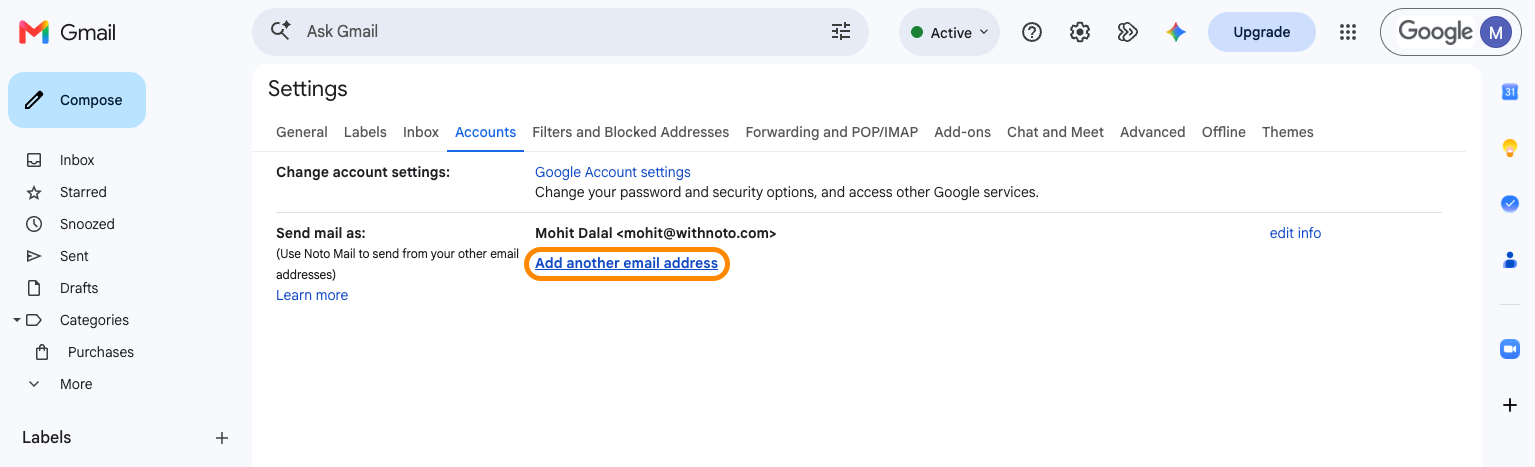
Enter the name you want recipients to see and your Google Group address.
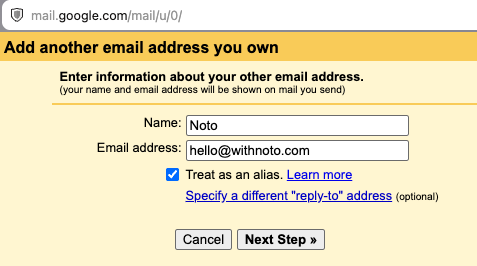
Leave Treat as an alias checked.
Click Next step, then Send verification.

Open the verification email sent to the Group and click the confirmation link or enter the verification code.
Once complete, the Group address should appear as verified under Send mail as.
If the verification email doesn’t arrive
The Group may not allow messages from outside your organization. Ask the Group owner or your Google Workspace administrator to:
Temporarily change Who can post to Anyone on the web.
Resend the verification email from Gmail.
Complete the verification.
Restore the Group’s original posting permissions immediately.
For more details, see Google’s guide to sending email from another address or Group alias.
Step 3: Connect Gmail to Noto
Now connect the Gmail account you used in the previous step:
In Noto, go to Settings → Communications → Email.
Click Connect Gmail under Organization Email.
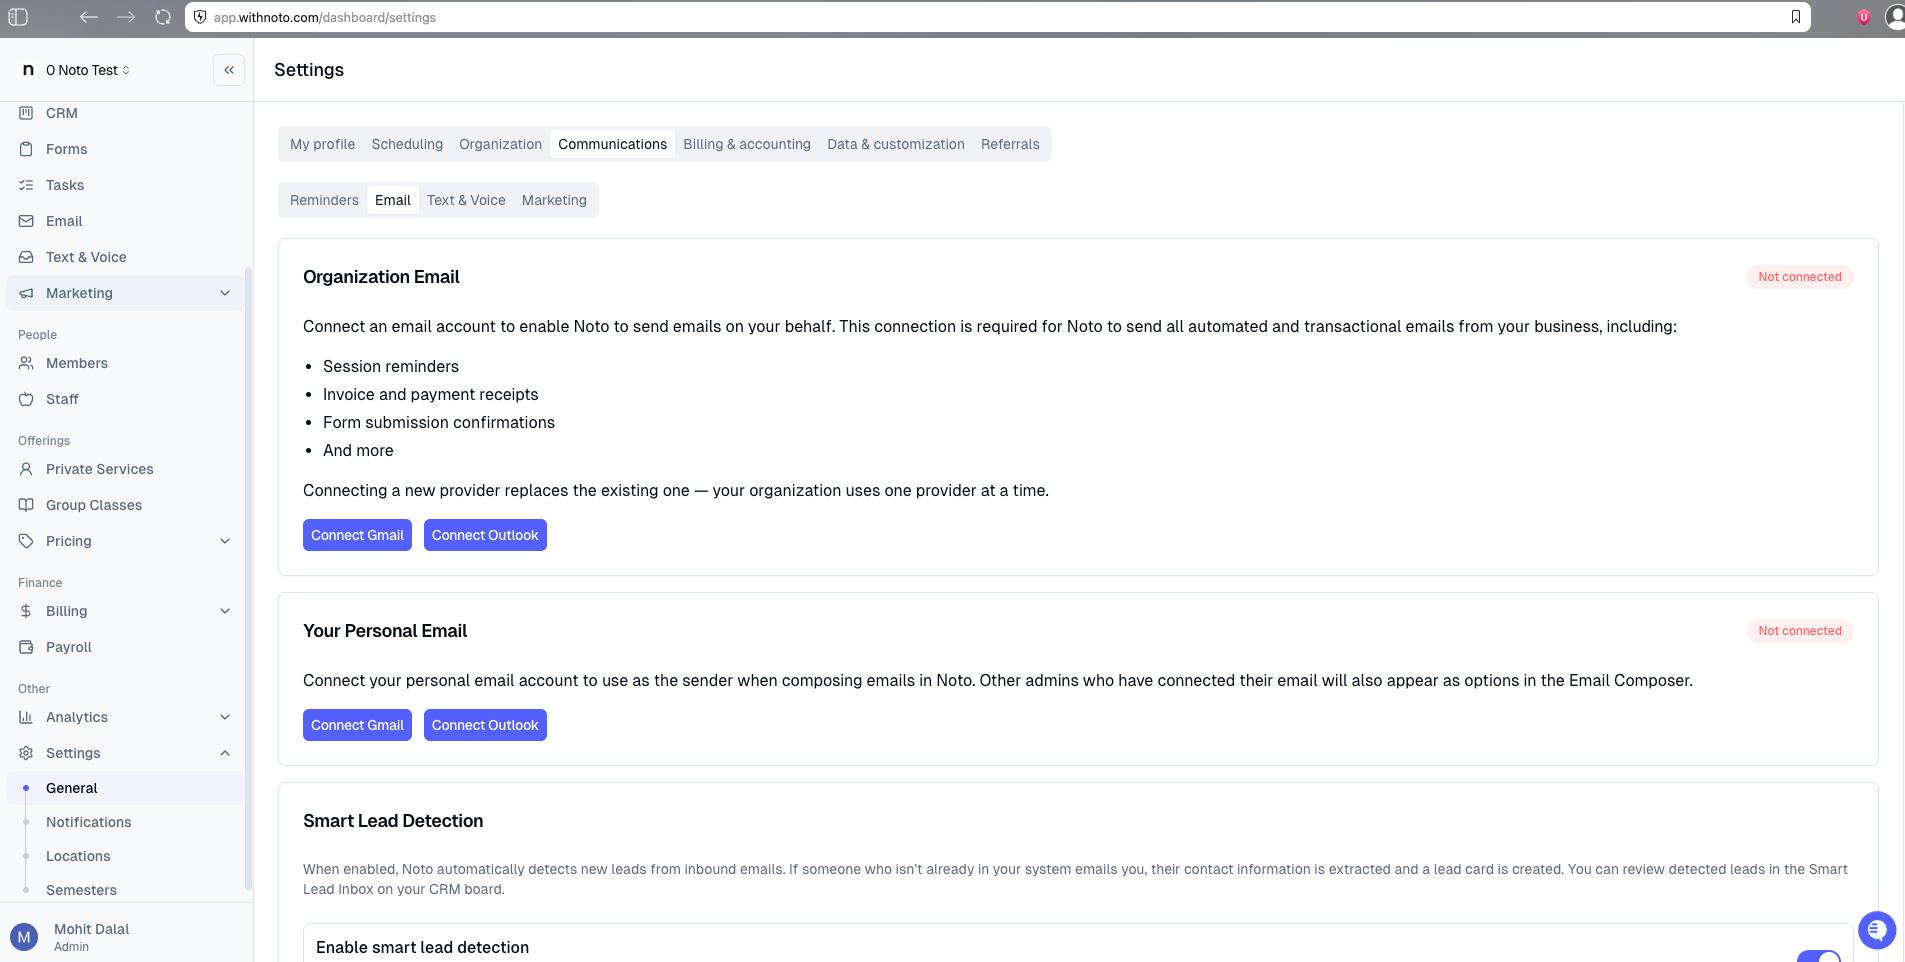
Sign in with the same Gmail account where you added and verified the Group address.
Review and approve the requested Google permissions.
If that Gmail account is already connected to Noto, you can skip this step.
Step 4: Choose your organization email address
Still in Settings → Communications → Email:
Find Send mail as.
Open the dropdown.
Select your verified Google Group or alias.
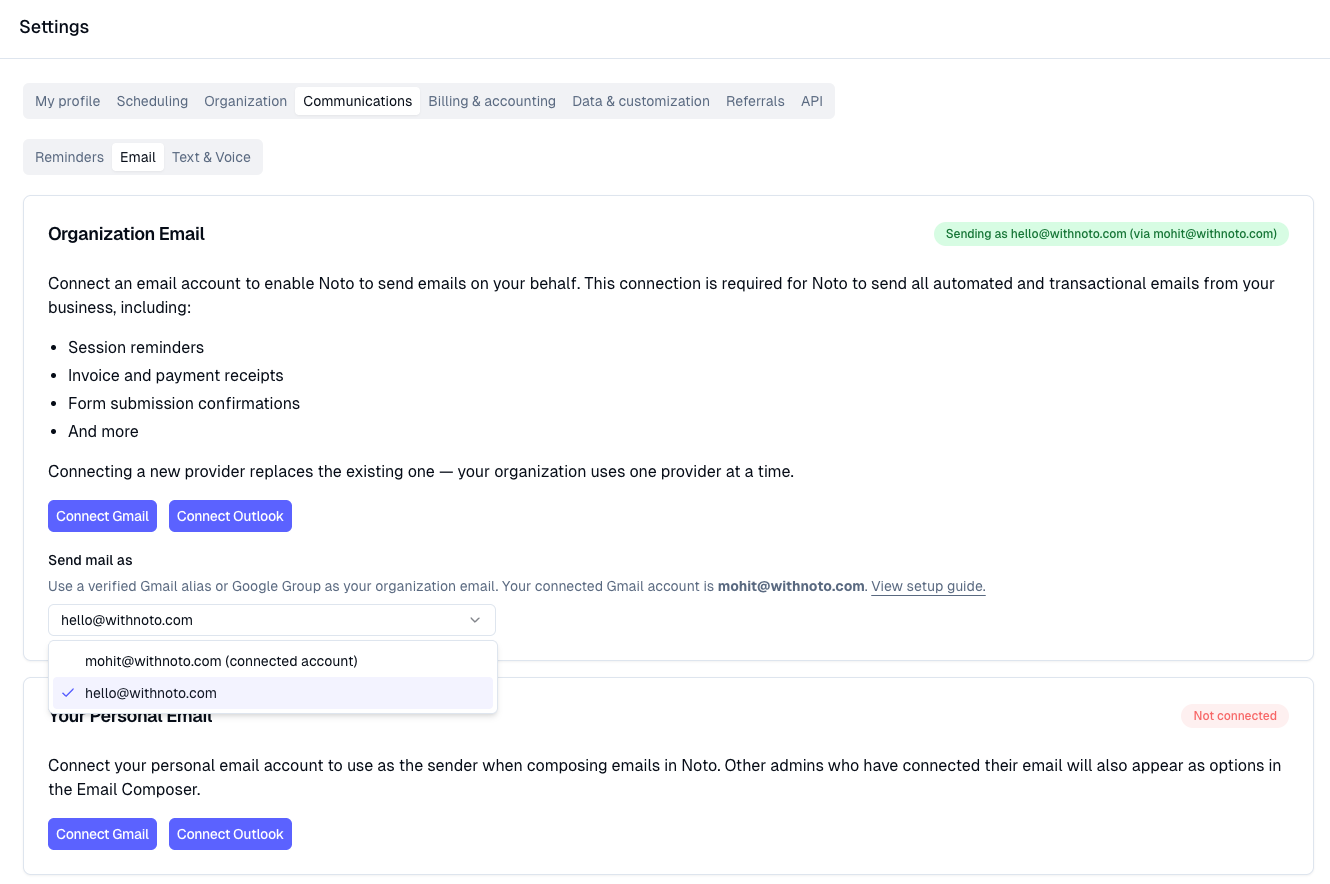
Noto saves your selection automatically. Only addresses that Gmail reports as verified will appear as available options.
You’re all set
Noto will now send organization emails from the Group or alias you selected. Replies will also appear in Noto as long as they are delivered to the connected Gmail inbox.
Troubleshooting
Group address not listed in Noto
Complete verification under Gmail Settings → Accounts → Send mail as, then refresh Noto. Google’s Send-as guide
Replies not appearing in Noto
Ensure the connected Gmail account is a Group member with its subscription set to Each email. Google’s subscription guide
Send-as address needs attention
Re-add or verify the address in Gmail, or choose another address from Noto’s Send mail as dropdown.
Gmail was reconnected
Return to Noto’s email settings and select the Group address again.