The Member Portal Resources page
Last updated: July 1, 2026
The Resources page gives members a single spot in their portal to find the external files and folders you want them to have — think Google Drive links, Dropbox folders, links to PDFs, practice trackers, or anything else you host elsewhere. You publish rich-text content with links; Noto surfaces it at the Resources page in the Member Portal for easy access in one place.
How it works
Resources is a publishing surface. You write rich text and paste in links to content that lives in your existing storage (Google Drive, Dropbox, or anywhere else with a URL). Members open the Resources page in their portal and see everything in one place.
There are two kinds of resource blocks:
A shared block for the whole org. One rich-text block that every member sees. Use this for materials that apply to everyone — studio policies, general practice guides, recital info, shared documents.
Per-member blocks. A rich-text block scoped to a single member, useful for individualized assignments, lesson notes links, or a personal folder shared just with that student.
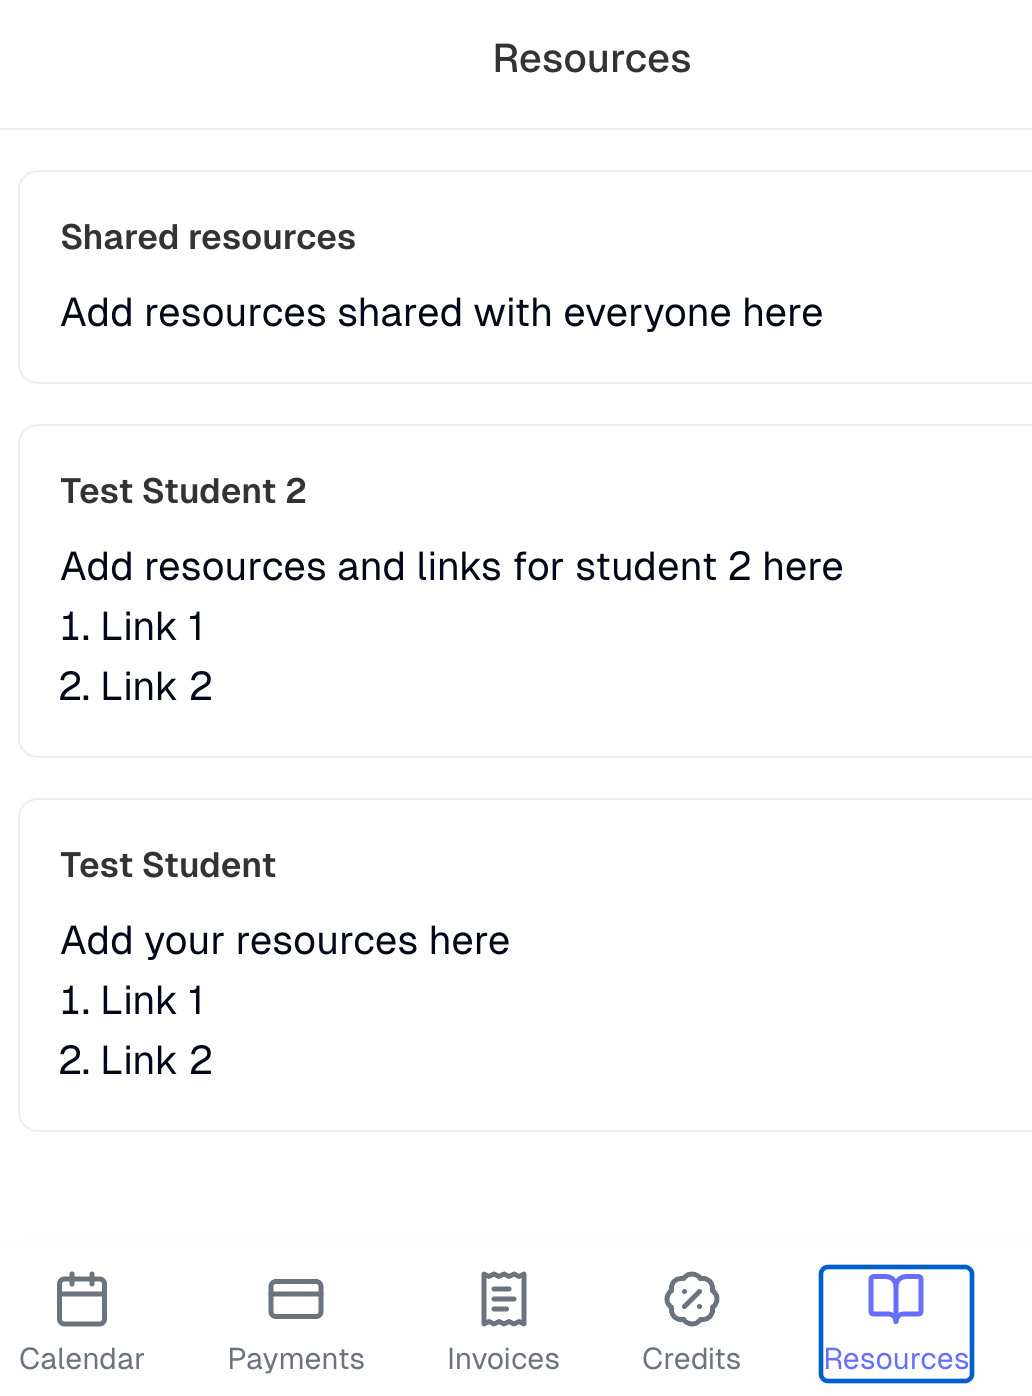
What members and guardians see
A signed-in member visiting the Resources page sees:
The org-wide shared block.
Their own per-member block, if you have authored one.
Guardians see something a little different. In addition to the shared block, they see a separate per-member block for each of their dependents. If a parent has two children enrolled, they see two dependent blocks, one per child, so the right materials for each student are always easy to find.
Turning it on
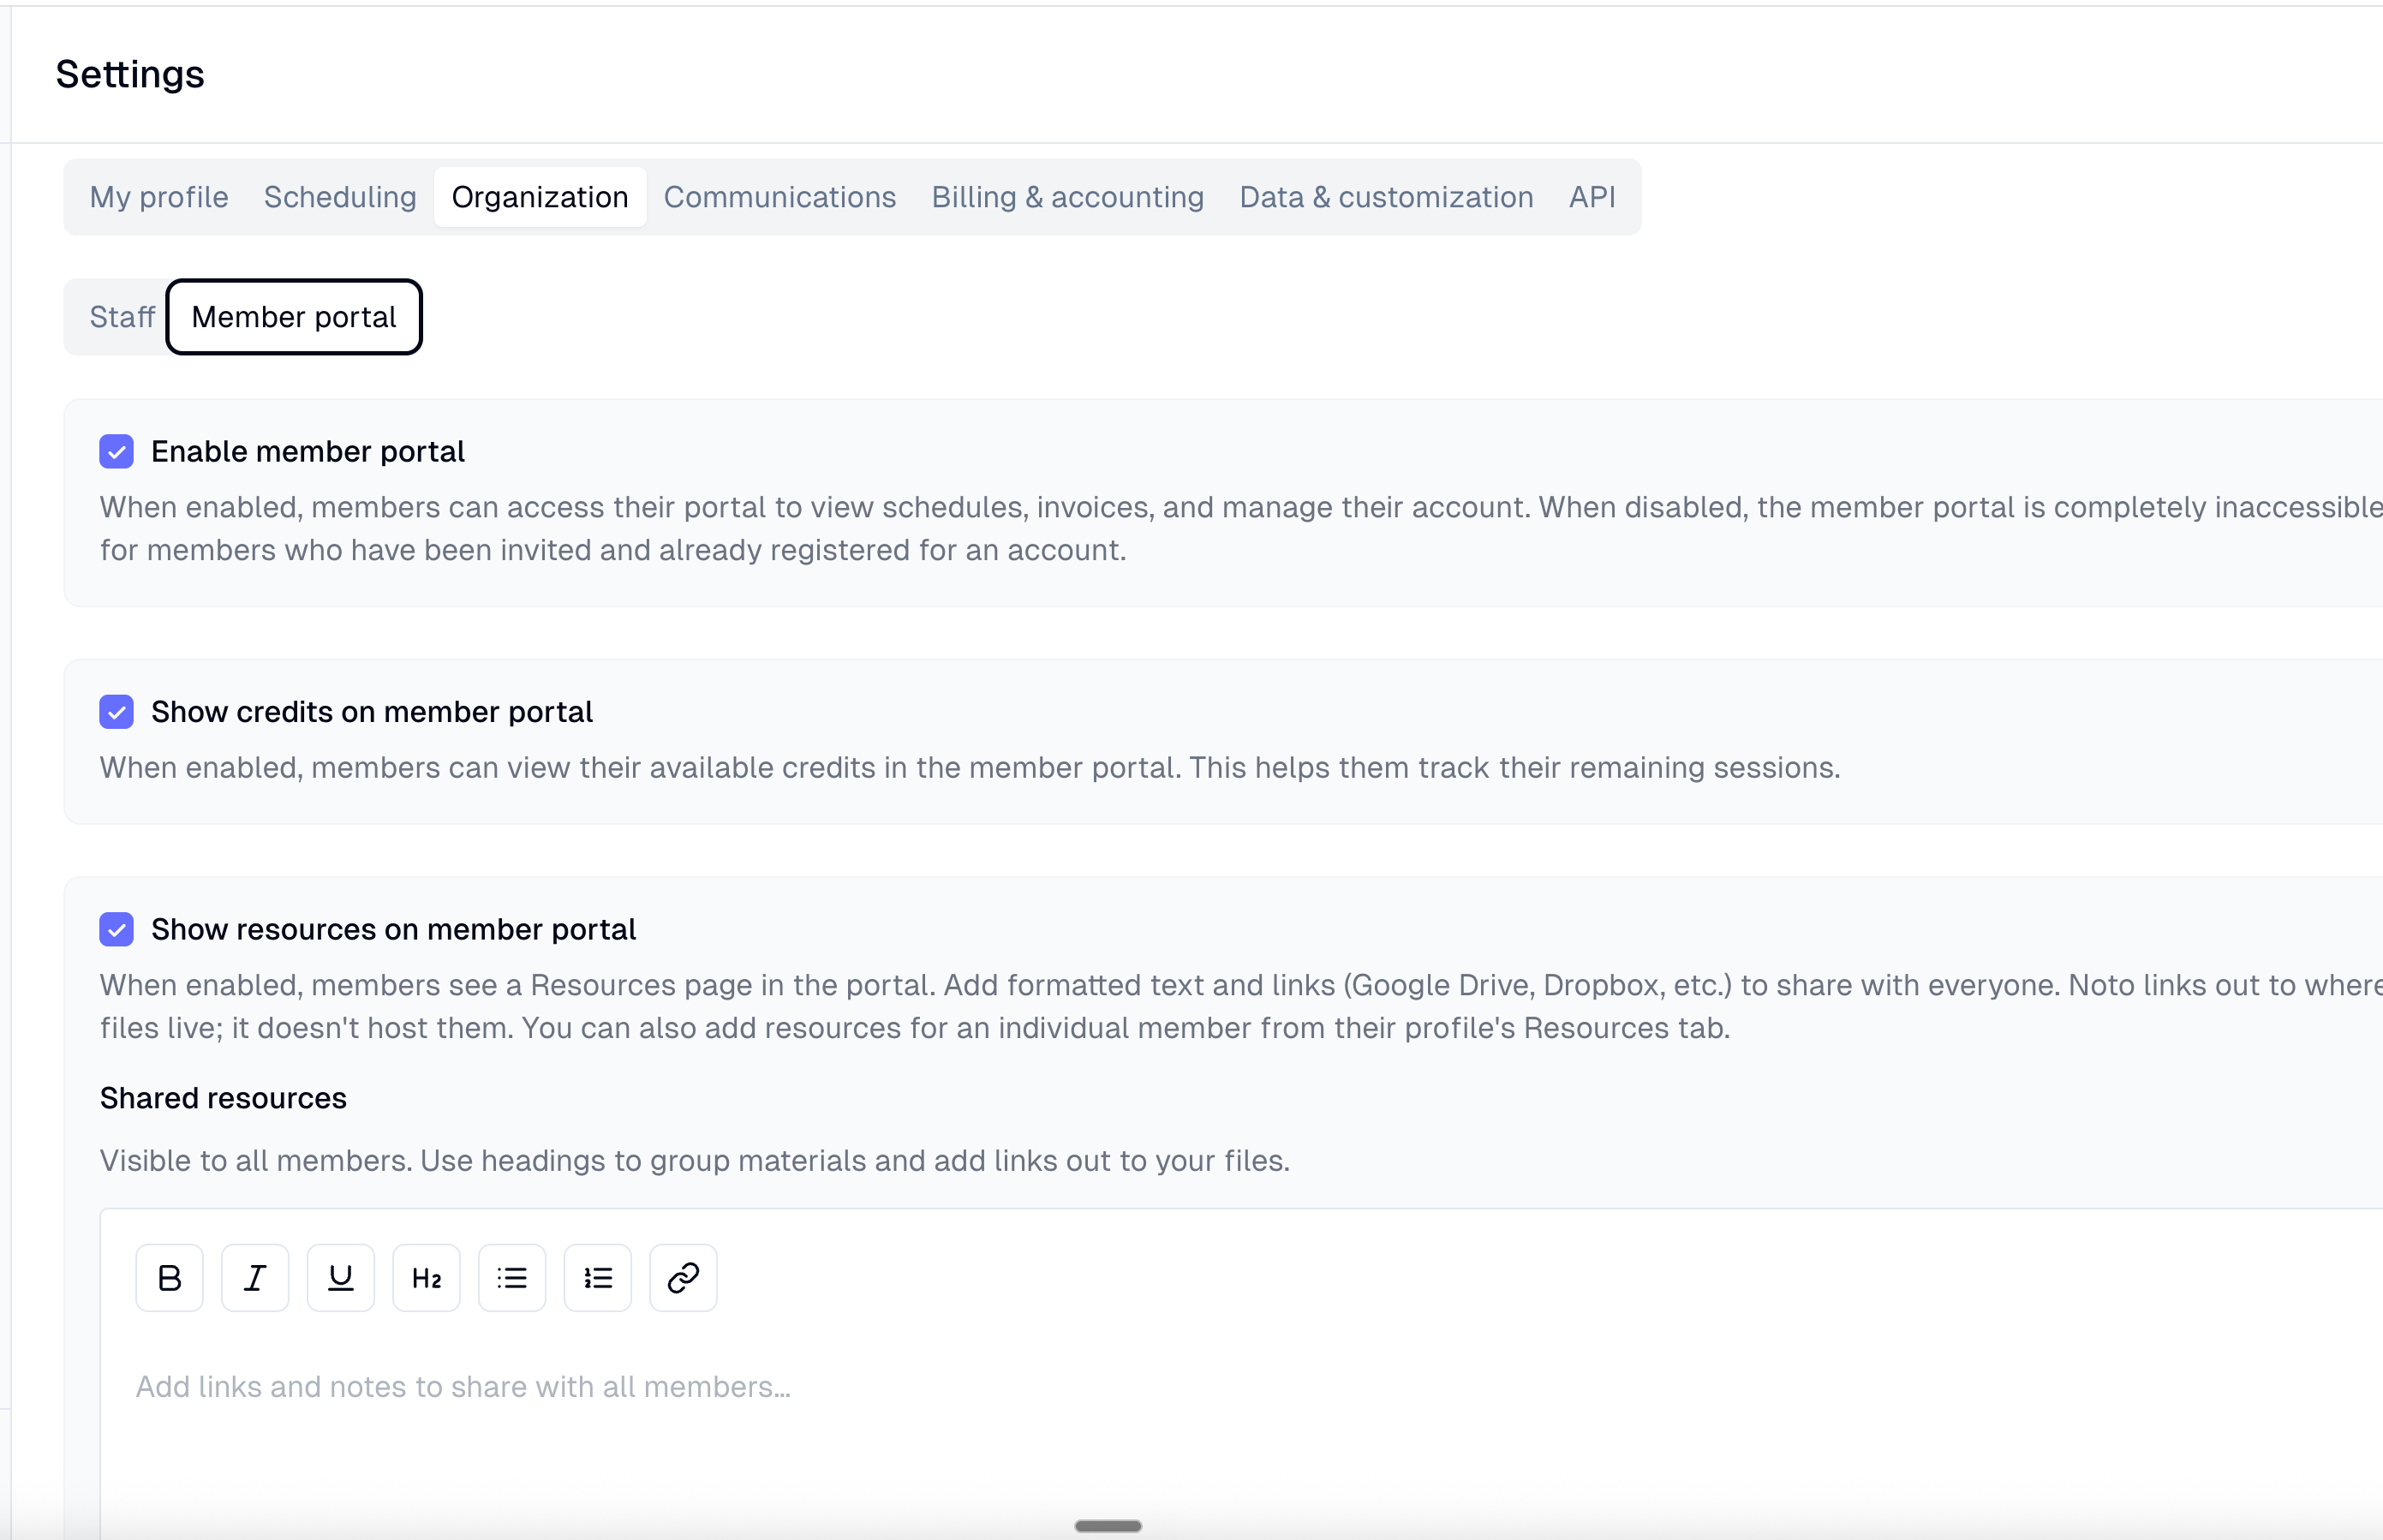
The Resources page is controlled from Member Portal settings on the Settings page. Enable the portal Resources page there before you start publishing — the per-member Resources tab on member profiles only appears once the feature is turned on for your org.
Publishing resources
To edit the org-wide shared block:
Open Member Portal settings.
Edit the shared resources rich-text block.
Add your text and links, and save.
To publish resources for a specific member:
Open the member's profile from the Members page.
Go to the Resources tab on their profile. (This tab only appears when the portal Resources page is enabled.)
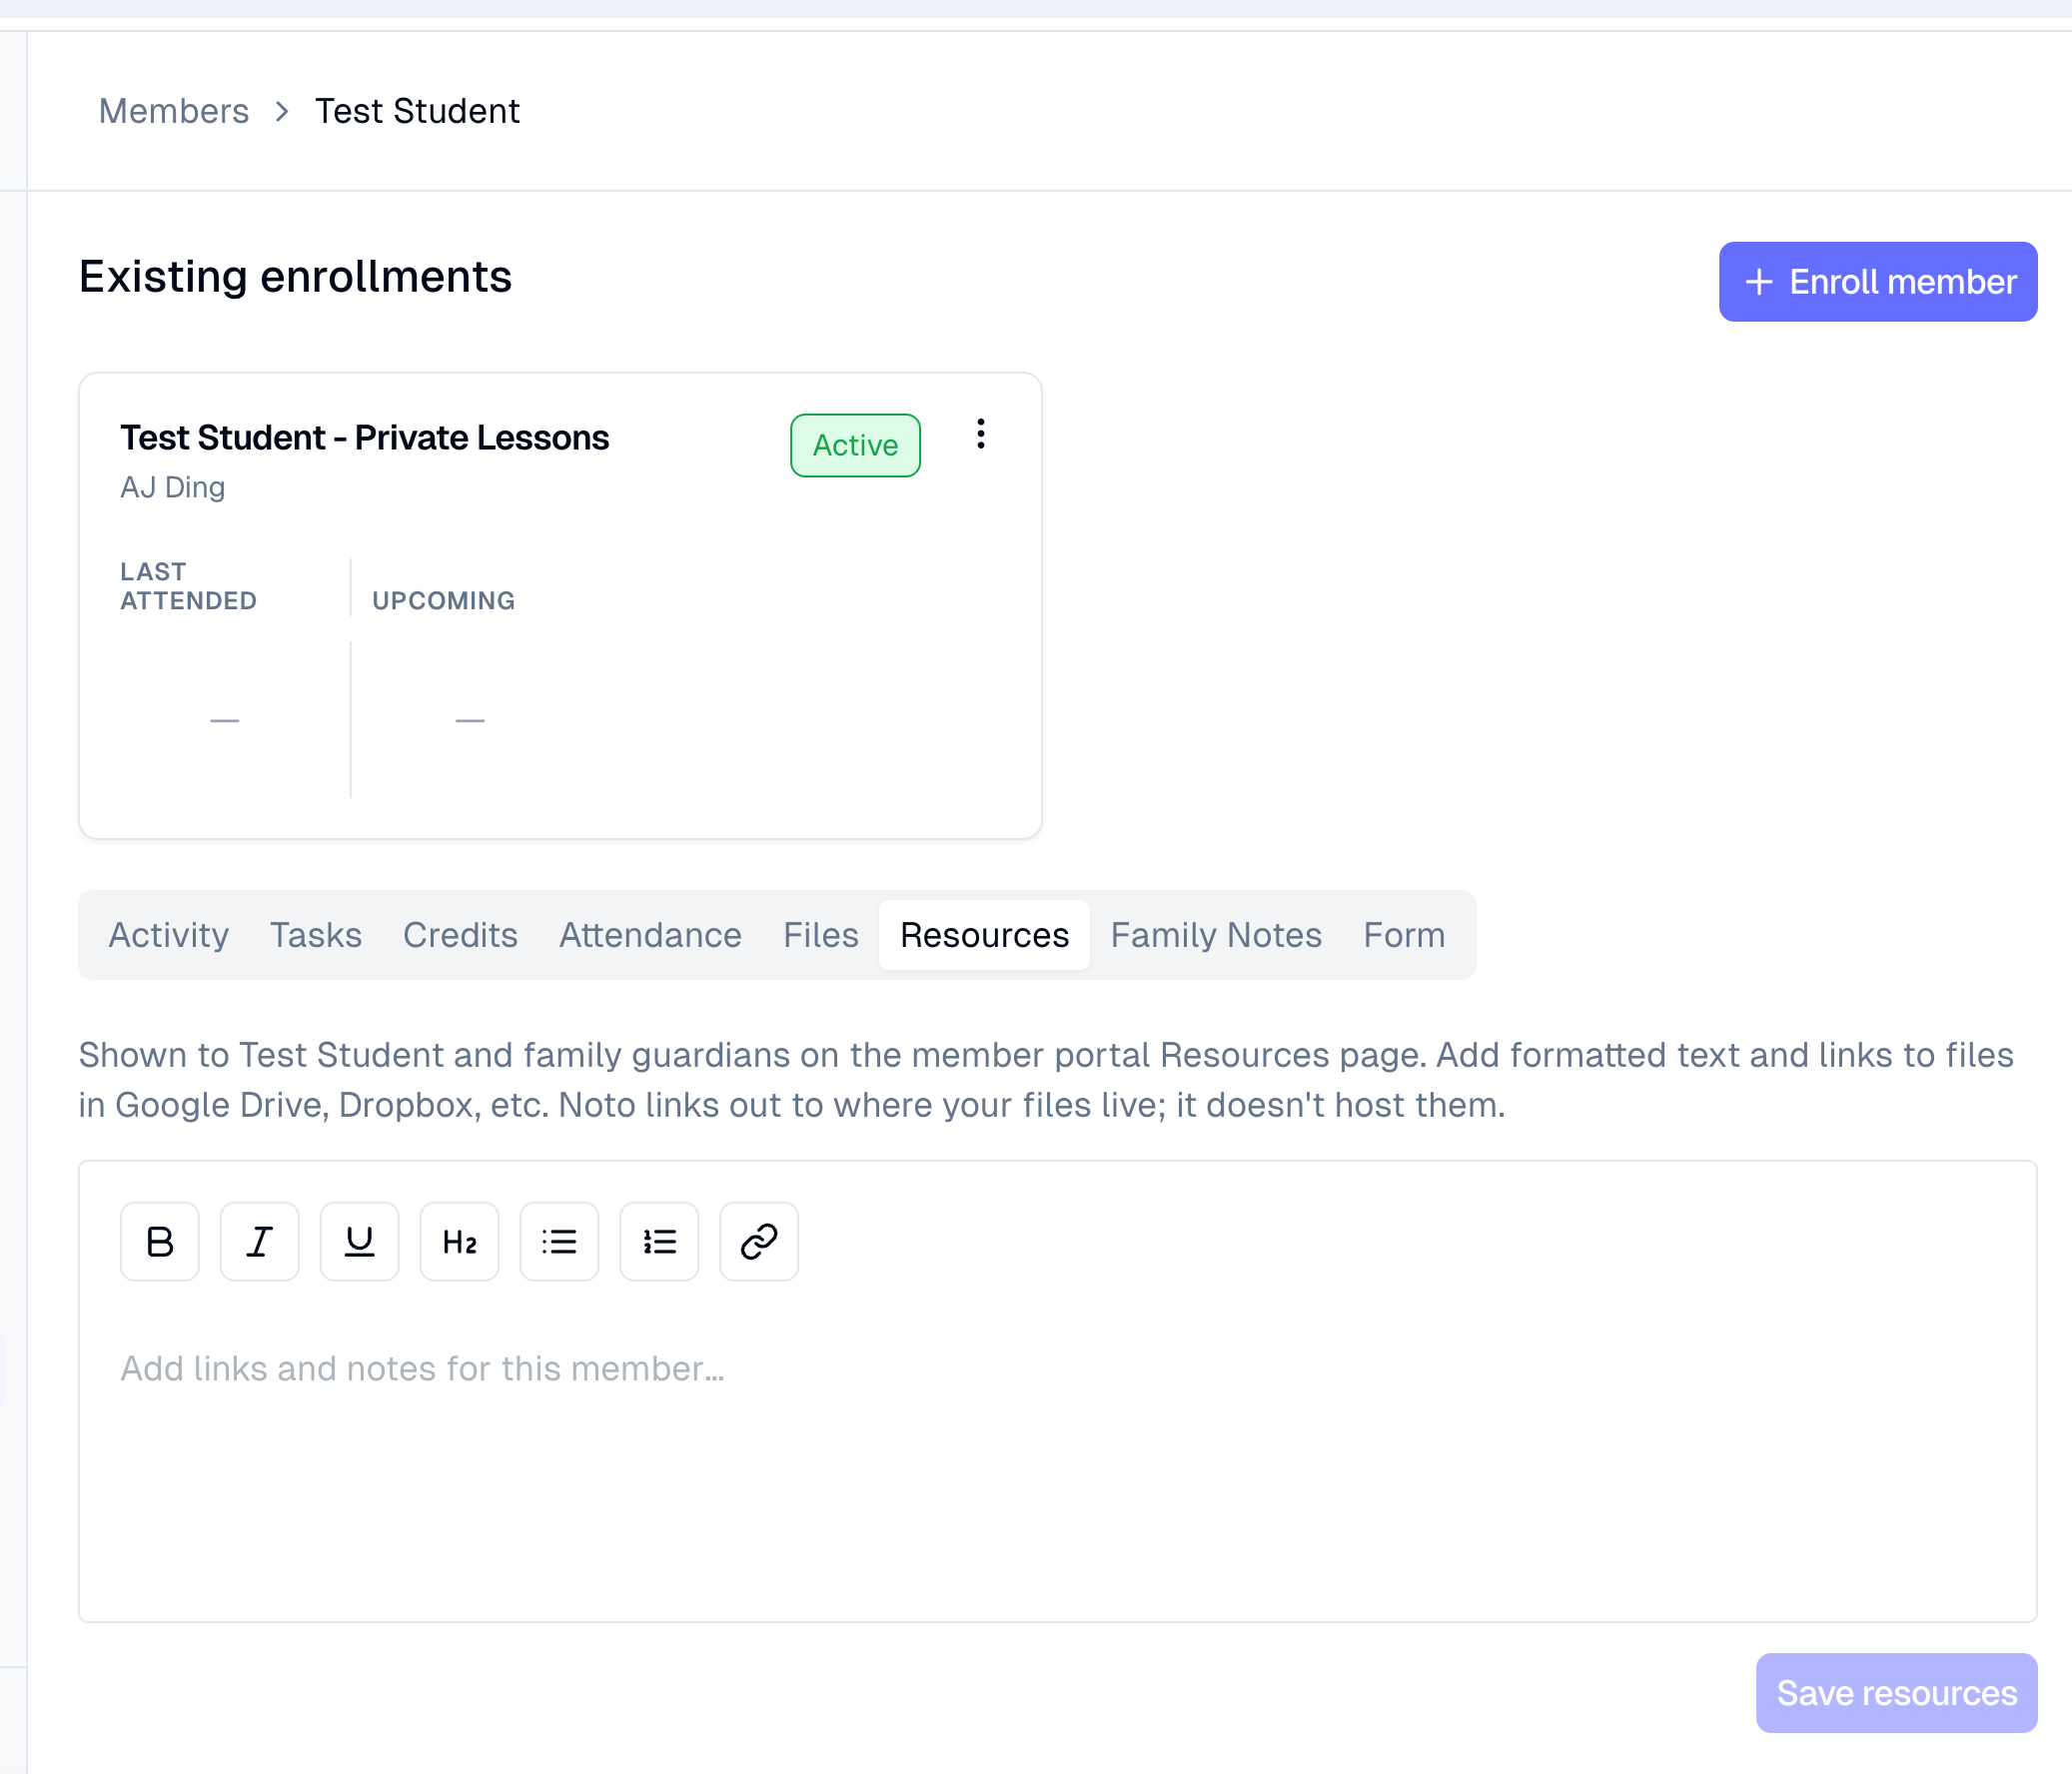
Add your text and links, and save.
Once saved, the member sees the content the next time they open the Resources page in their portal. If the member has a guardian, that guardian will also see the block under the dependent's section.
To view the Resources page as your members do, impersonate a member and navigate to the resources section to confirm that the page appears as you configured it.